
Rufus is a small and free utility for creating bootable USB drives for installing various operating systems. Unlike Microsoft's Media Creation Tool (MCT) app, which supports only Windows 10 and 11, Rufus also works with Windows 7, 8.1, 10, 11, Linux, and other operating systems.
Besides better OS support, Rufus provides several quality-of-life improvements, especially for those wanting to install Windows 11. For starters, Rufus can bypass TPM 2.0 and Secure Boot requirements to create an install media compatible with older and officially unsupported hardware. Other neat features include the following:
- Automatic offline profile creation.
- Skipping the requirement for a Microsoft Account.
- Disabling "data-harvesting" options during the initial setup.
- Settings migration to speed up the initial setup process.
- Turning off default BitLocker disk encryption.
Users can combine Rufus and the Media Creation Tool when creating a Windows 11 bootable USB. For example, download an official ISO using MCT and then flash it using Rufus. Alternatively, you can download the original Windows ISO files directly in Rufus (supported versions include Windows 11, 10, and 8.1). It is worth noting that Microsoft has yet to update its official Media Creation Tool app with the recently launched Windows 11 version 23H2 images, so Rufus and similar third-party apps are your only option to make a Windows 11 23H2 install media.
Note: Although Rufus allows creating a bootable USB with old and unsupported Windows versions, the app only works on Windows 8, 8.1, 10, and 11. Sadly, Windows 7 is no longer supported.
Create Windows 11 installation USB using Rufus
- Begin with downloading Rufus from the app's official website. Rufus is free, and it is available in installable and portable variants.
- Connect your USB drive (8 GB is the minimum requirement) and launch Rufus. If you need to change the app's language, click the button with a globe icon.

- Select the USB drive from the Device drop-down.
- If you already have a Windows 11 ISO, select Disk or ISO Image and click Select, then skip to Step 9.
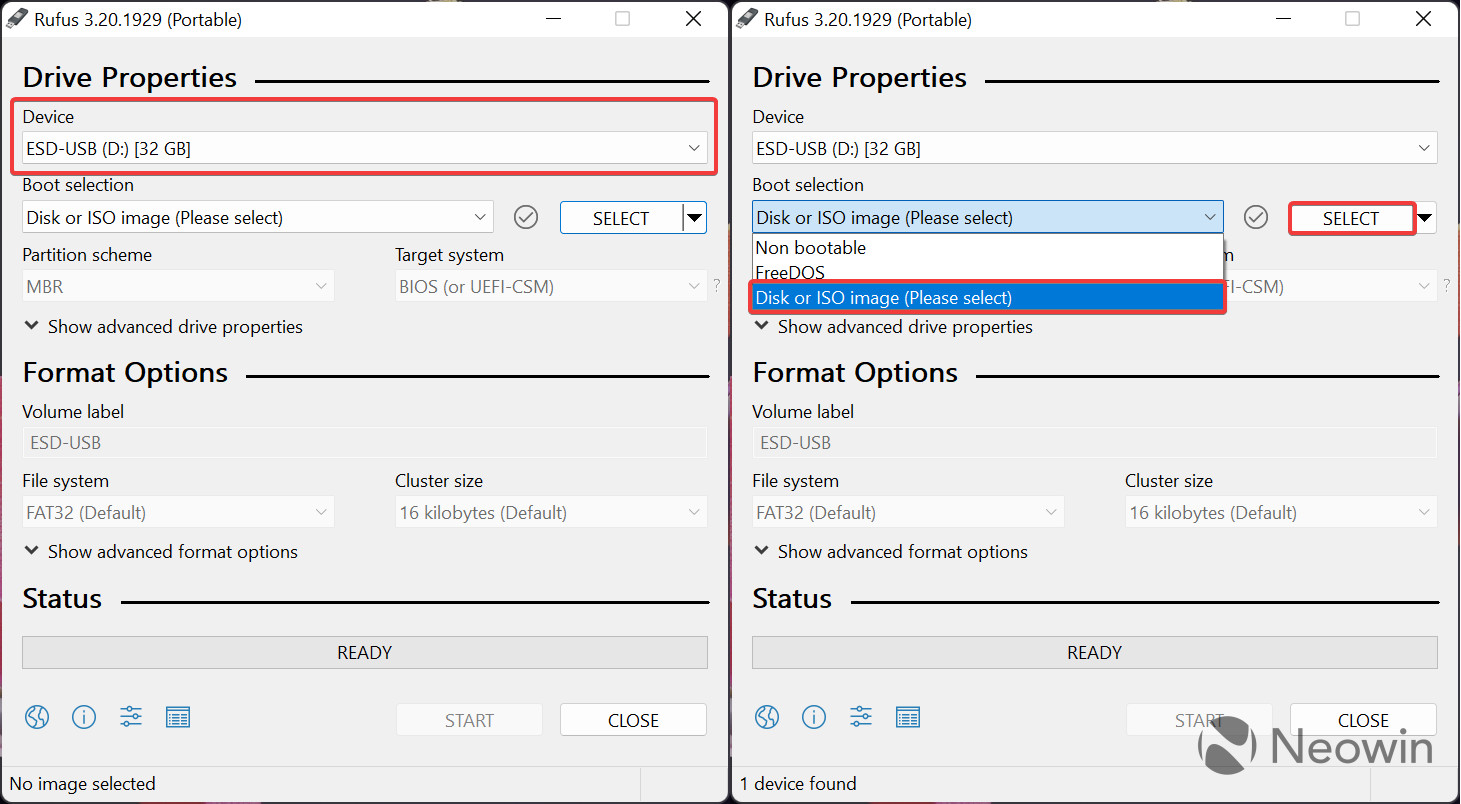
- You can download the original Windows 11 ISO file using Rufus if you do not have it. To do so, click the arrow-down button next to the Select button and press Download. Note that you must let the app check for updates; otherwise, the download option will not appear.
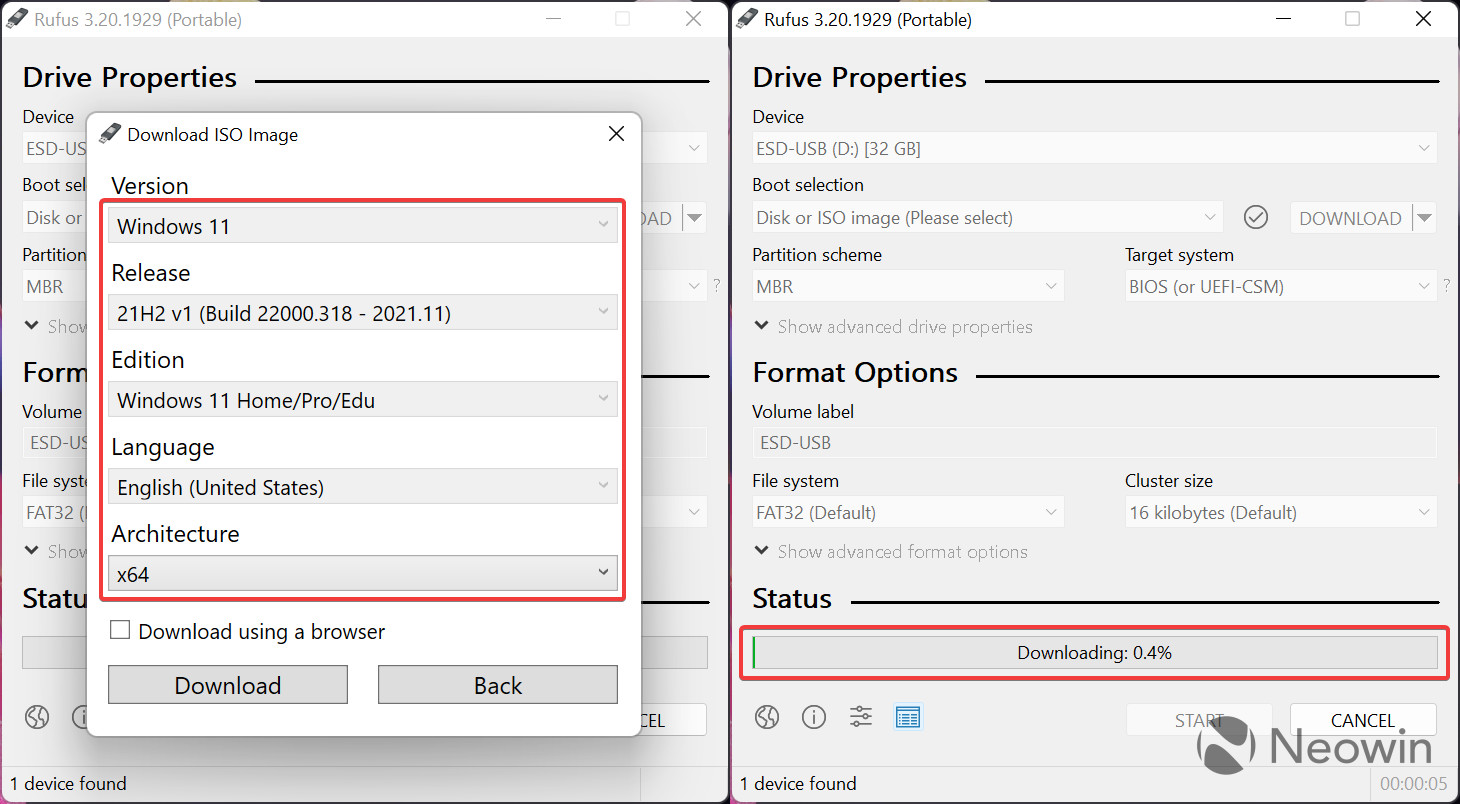
- Click the Download button again and wait a few seconds for Rufus to run the needed script. Note: Rufus uses a third-party script to connect to Microsoft servers and download original ISOs.

- Select the Windows version you need, and click Continue. The app will prompt you to pick release, SKU (Edition), Language, and architecture.
- Once everything is set, click Download, specify where Rufus should save the ISO, and wait for the app to complete its job.
- Now you are ready to write the ISO to the USB drive. You can leave the Volume Label as is or rename it to something more palatable, for example, Windows11_Install.
- Click Start.

- After clicking the Start button, Rufus will offer you to customize the installation with the following options (place checkmarks next to the ones you need):
- Remove Requirement for 4GB+ RAM – tick this option if you want to install Windows 11 on a computer with unsupported hardware.
- Remove requirement for an online Microsoft account—select this option to skip the Microsoft Account requirement. Windows 11 will not ask you to sign in with a Microsoft Account during the initial setup.
- Create a local account—you can specify your account name, for example, Neowin.
- Set regional options using the same values as this user – Rufus will copy the current regional settings to the new installation.
- Disable data collection – Windows 11 will not ask you to send diagnostic data, enable location, advertisement ID, and other things some users consider privacy-invading.
-
Disable BitLocker automatic device encryption—this will ensure BitLocker is not turned on by default.

- Click OK and wait for Rufus to create a Windows 11 installation USB. You can check the progress in the Status section.
Now you can use your USB drive to install Windows 11 from scratch. Restart your computer and boot from the newly made Windows 11 install USB.


47 Comments - Add comment