Backups are one of those things that everyone needs to do, yet many people ignore. Then when your hard drive goes bad or you accidentally delete a file with key information, you panic and realize you have few options remaining. There are a few keys that all backup software should adhere to:
- It should work automatically, without care and feeding
- It should notify you when it’s not working properly
- It should be available when you need it and restore files effortlessly
The last point is important: Nobody cares about backups, but everyone cares about restores; they must not only be available when you need them, but should also be easy to use in an emergency.
With these points in mind, we look at Acronis True Image 2013 along with the Plus Pack add-on. Priced at $49.99 for the base product and an extra $29.99 for the Plus Pack, this sounds like the perfect backup solution. You can do full bare metal restores to not only protect against boot disk failures, but to also easily grow your boot disk. You can set up your backups to wake your machine up in the middle of the night so that you don’t impact your own workflows. You can even backup to Acronis’ “cloud” so that you have an offsite backup.
Installation
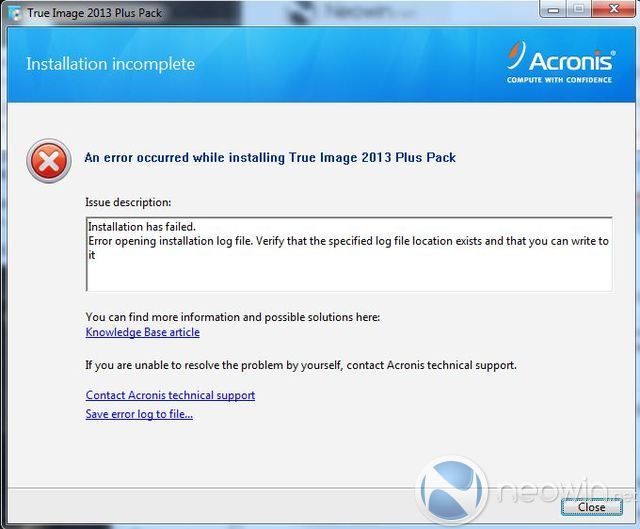
Installation of the software wasn’t quite as straight-forward as it should’ve been. When opening the installation file, Windows prompted for the admin password. We were able to go through the installation process, but received an error before anything was installed: “Installation has failed. Error opening installation log file. Verify that the specified log file location exists and that you can write to it.” After spending some time trying to figure it out, we decided to right-click the installation file and select, “Run-as administrator.” That seemed to do the trick, but the Acronis engineers should really make that clear, because novice users might not have figured it out.
The Plus Pack is a straight forward install, but requires that the base True Image software be installed first. This tool gives you the ability to restore to different hardware – either a larger drive or even an entirely different piece of hardware.
Configuration
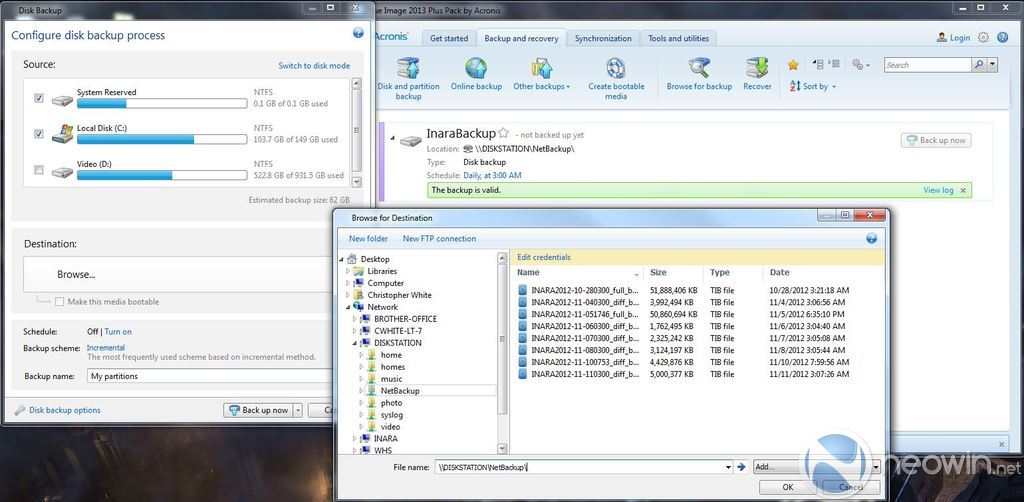
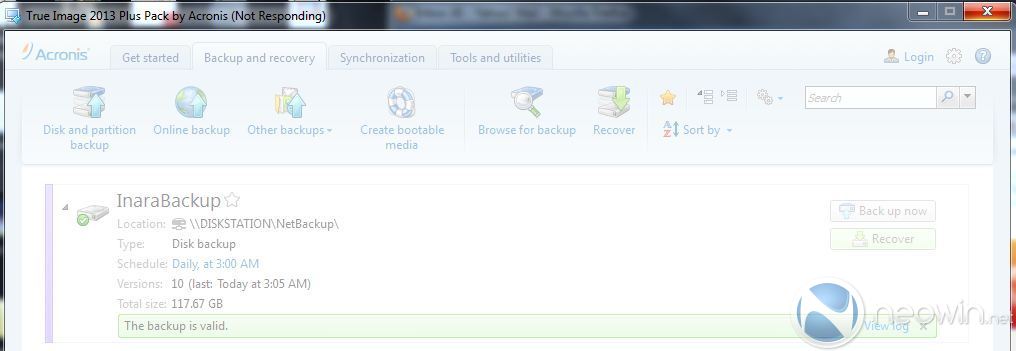
Configuring a backup is very straightforward. Click the “backup and recovery” tab, then click “disk and partition backup,” and select what you want backed up. The main strength of True Image is in the various backup modes and options you have available, and we’ll discuss some of the highlights here.

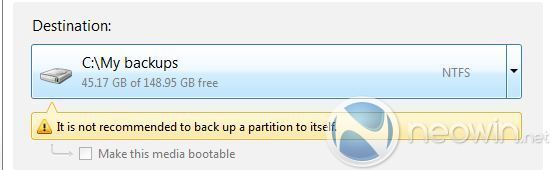
First, you can set up your backup based on partitions or entire disks. Partitions will let you backup based on drive letters, while disks does exactly what it sounds like. Once you select what to backup, you select a destination. A nice feature is that True Image 2013 will tell you that it’s not a good idea to backup a drive to itself – but it lets you do it if you insist.
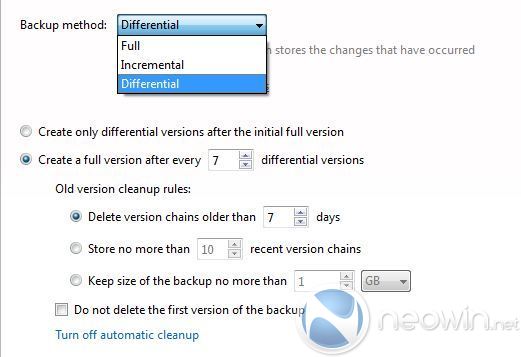
From here, you decide what backup methodology to use – full backups, incremental, or differential. For those who aren’t aware of the differences, we’ll explain:
- Full Backup: A complete backup each and every time – easy to restore, but takes a lot more disk space and each backup will take longer to complete.
- Incremental Backup: Only backup the changes since the last full or incremental backup. Restores require the full backup and then every incremental up until your restore point. More difficult and takes longer to restore, but uses less disk space.
- Differential Backup: Only backup the changes since the last full backup. Restores require the full backup and then the most recent differential. Takes up more disk space than the incremental, but is faster to restore and more reliable.
We personally think that differential is the way to go; create a full backup weekly and then differentials daily.

The configuration gives True Image the ability to clean up after itself. You decide how many backups will be saved on disk, how frequently a full backup should be taken, the maximum size each backup is allowed, and more. You can also set a compression level – more CPU, less disk space, longer restore time – and the CPU priority. Email notifications can also be set up, but this requires telling the software what your SMTP server, username, and password are. Why can’t the software alert us about any errors on the desktop? This seems like a major oversight.
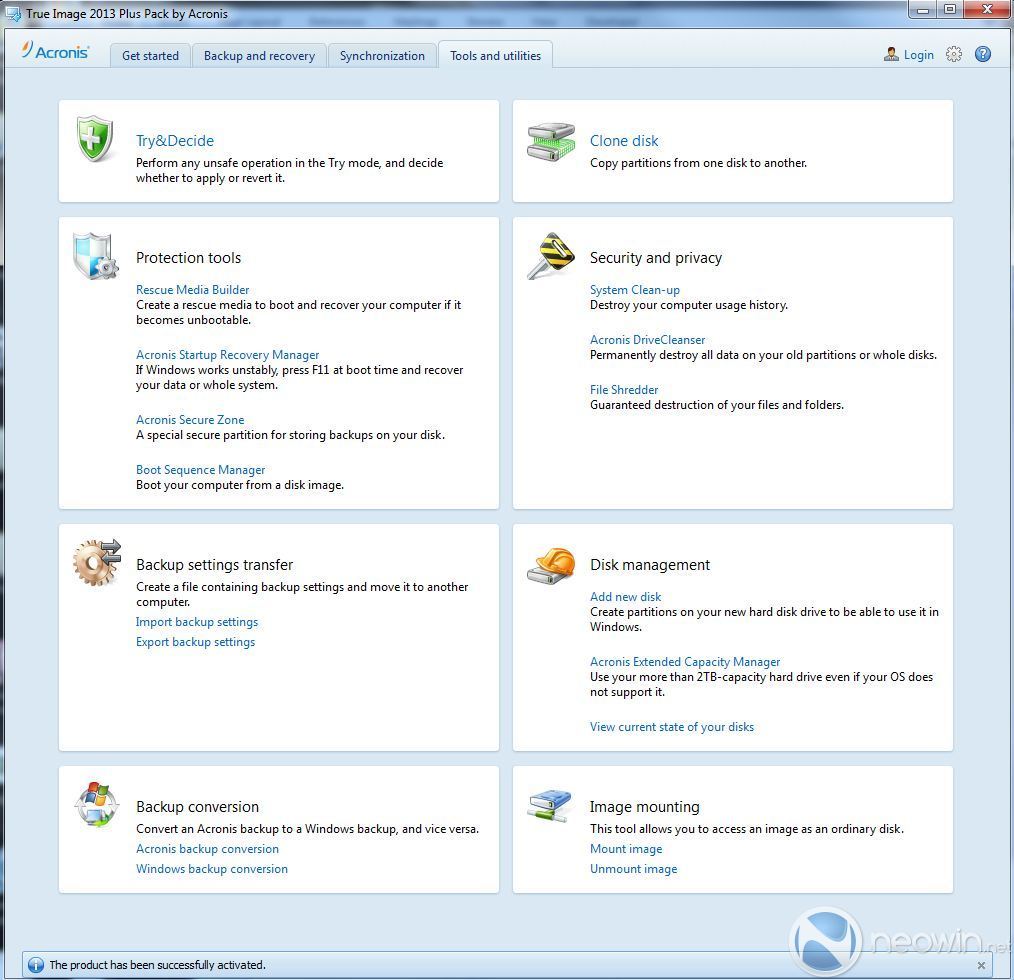
Once you have your backup image, you’re protected from data loss and there are a number of ways to restore your data. You can create bootable media that allows you to restore in the case of a catastrophic failure; we feel that this is the most important backup option the software offers. You can mount the image file within True Image and browse the filesystem, recovering whatever files you want. There’s also the option to right-click on a file and select which version you’d like to revert back to.

The software also has the ability to synchronize folders (not to be confused with the “Synchronization” tab, which is how you backup to the Acronis cloud) via a “Nonstop backup” feature. Setup is easy – select what folder you want to backup and where you want the image to be stored. As you make changes to files within that location, True Image 2013 will copy the changes across for you. You’re then able to restore to a point in time, which can be handy.
Backing up to the cloud is one feature we did not test, as it’s not technically included with the software. While True Image is able to backup to the cloud, that’s an extra paid cost – currently $4.95 per month or $49.99 per year for 250 GB of storage. The advantage to this offering is the company allows you to back up five different machines with a single subscription, so this could be a selling point for some people.
Recovery
As we stated before, nobody actually cares about backups. The only thing that’s important is the recovery, and if you can’t restore what you’ve backed up, what’s the point? Acronis promises users can restore backed up disk images not only to the same hardware but, with the Plus Pack, to any similar hardware.
With that in mind, we took our bootable USB drive and plugged it into an HP laptop that has a larger drive than the system we originally backed up, and tried to restore the system. After it booted, we navigated to the NAS share that contained our images and selected one of the differential backups. The interface was a little clumsy: We expected it to automatically advance or to have a “next” button somewhere, but instead we had to right click on the filename and select “restore.” Not difficult to figure out, but still not as streamlined as we expected.
After selecting the physical drive we wanted the backup to restore to, we were greeted with an error message: “Can’t find volume 2.” After clicking “cancel” a few times, “Can’t find volume 3” came up. Eventually, after continually clicking cancel and expecting nothing to work, the restore started. Approximately three hours later, the restore was completed.

We rebooted the laptop, but were immediately greeted with a boot error: The MBR is faulty. Unwilling to give up, we found our Windows 7 DVD, ran the repair process on the system a couple of times, and rebooted. This time we were greeted with the Windows 7 boot screen! The initial boot took a while and once we reached the desktop, Windows began installing a few dozen device drivers before rebooting again.
When all was said and done, we were left with a completely functional working system!
Issues
While this all sounds great, True Image isn’t without its warts. For example, the software is not able to do a simple copy of individual files to a different location, like rsync and SecondCopy can do. We understand that the name of the software is “True Image,” but that doesn’t mean all of the backups should have to be image files. For example, we would’ve liked to have seen an option that lets us automatically copy our music files from our desktop to a centralized NAS location that is shared with the entire house. We opened a case with Acronis’ support team to confirm that this functionality does not exist.

There were many times during our testing that the software simply locked up on us. This was extremely common when deleting a backup set. A small window would open up on the right hand side of the screen saying, “Deleting Backup,” and it would continue indefinitely, forcing us to kill the True Image process and restart it. We also occasionally encountered lockups when setting up a backup and selecting a NAS device on the network. While these lockups didn’t impact us during the backup/restore process, we want our backup software to be rock solid: When we need our data restored, the software better work 100% of the time.

The strangest one was the fact that we couldn’t restore a file using the context menu. We right clicked on a file, selected True Image, then recovery, were presented with a list of backups to restore from, but when we picked which backup we wanted, nothing happened. While it’s not the end of the world, since there are other ways to restore files, it’s still strange that the functionality doesn’t work.
Conclusion
It’s difficult to decide whether we liked Acronis True Image 2013 or not. On one hand, it felt like we were constantly fighting with the software to get it to work. From lockups, to menus not functioning, to weird error messages during the restore process, we feel like the software isn’t ready for primetime. On the other hand, despite all of these minor issues, we were able to restore a system to completely different hardware and it was relatively painless even if we didn't have a warm, fuzzy feeling during the entire process. We’re also disappointed that the software didn’t alert us during failed backups; while we could setup email notification, we’d prefer a popup from the system tray.
Then there’s the fact that you need to purchase a separate license for each machine you want to backup. It would’ve been nice if we could install the software on each machine on our home network, but we suspect most people don’t have a lot of machines laying around like we do.
For the price ($50 for the base, an extra $30 for Plus Pack), we feel that this is a respectable solution to help protect your computer. While we hope that Acronis irons out some of the annoying bugs in the product, the software seems to work as advertised.
![]()
Gallery: TrueImage2013-2


38 Comments - Add comment