Walking into the newly redesigned Radio Shack in downtown Manhattan, the first thing that struck me was, where did everything go? As I walked around the minimalistic and heavily consolidated displays, I realized that streamlining inventory was important for the success of the company, newly reborn with colorful and attractive displays for their best selling products. As I walked past the merchandise, I saw a wall covered in what appeared to be circuit boards, unlike the rest of the store, dominated by phones, headphones, media systems and remote controlled toys. Upon closer examination, I realized that these were Arduino compatible products, and immediately I got a rush of nostalgia, reminding me of the days when every little resistor and transistor was available in the store. They might still be available, but they are no longer the major sellers of the tinker friendly store. Instead, do it yourself enthusiasts are looking towards breadboard solutions to develop their new gadgets, and rightfully so.
Naturally, I began to wonder just how far these projects have gotten since their inception. Researching further, I realized that the magnitude of growth was far greater than previously imagined. What I thought would be an electronics board with LED control and perhaps FM functionality, unraveled into a world which included Bluetooth, Wi-Fi, displays and controllers, as well as some advanced robotics. I have compiled some interesting devices based on the technologies below, as well as an attempt to clarify the differences between the top two providers, Arduino and Raspberry Pi.
Firstly, I'd like to explain that Arduino is a micro-controller, and Raspberry Pi (henceforth referred to as Pi) is a mini-computer. What this means is that the Arduino can be programmed using simple commands, while the Pi would require more complex commands which are accessed by means of the operating system you choose to run on your Pi mini-computer. A fantastic guide for beginners can be found here. The Arduino, therefore is suitable for electronics projects, while the Pi is great when an entire operating system capable of various computing tasks is required. The above guide brings the following example which can illustrate the difference when programming either board to light up an LED, for instance.
“On the Arduino, this involves connecting an LED and resistor to two pins, then uploading about 8 lines of code. That's it. On the Raspberry Pi - assuming you have a fully functional operating system already installed and set up as you like - you then need to install some libraries to help you control the GPIO pins (that's the bits you connect components to).”
Now let's dive into the available components:

This project, entitled the Alamode (A-la-mode) by Wyolum, allows one to combine the flexibility of Pi with the simple, solid commands of the Arduino, giving a user the best of both worlds. Retailing at around $35, this project includes the ability to power off a battery or AC, and is Micro-SD capable.

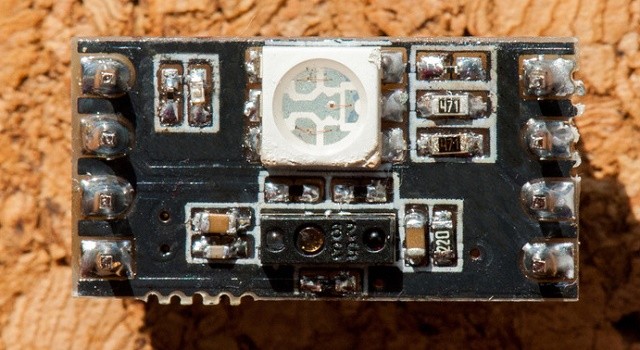
This is the Spark Core, aiming to bridge the Arduino-Pi gap with a chip (Arduino compatible) that includes Wi-Fi, and specializes in creating hardware that will interact with the cloud. It includes a 72 Megahertz ARM Cortex M3, a Wi-Fi module, and has many in/out pins (which allow further expansion of attachments.)

This is the Parallax Robotics shield kit, compatible with Arduino, and includes everything you need to make your own robot. Retailing around $135, the kit enables the enclosed robotic motors and servos to do your bidding. It includes touch, light and infrared sensors which can guide your robot, and is easy to use, designed with a solder free interface. It also includes the ability to expand with other components.
Next up is the GestureR, a device which allows Arduino to go ahead and read your commands at a distance, enabling the types of gesture control seen on certain phones and gaming systems such as Microsoft's X-Box One.

The Raspberry Pi is a bit more complex and allows the user to attach a screen which displays the chosen operating system. This is the PiScreen, which is a 3.5 inch TFT display which features a resolution of 480x320. It has all the necessary equipment to connect the screen to your Raspberry Pi, and, as usual, the ability to expand further with nine unused GIPO pins. With a touch-enabled screen capable of displaying 65,536 colors, this may be the right component for those looking to tinker with the full-fledged operating system capability of the Pi.

On the other hand, we have the simpler MicroView, which includes a small (chip-sized) Arduino with a display built in. The Arduino microprocessor has been shrunk into the 64x48 pixel OLED device, which can also be used to display information from your Pi. This device will let you see the effects of your commands quickly, and allows development to move quicker. A guide shows the user how to turn on LED's, get readings, take inputs from buttons, sense temperature and light, as well as operate motors and servos.
There are clearly many more projects and sensors that one can purchase once they have their Arduino or Raspberry Pi (or both) devices in hand, as well as similar modules to the ones above, tailored for either device. The possibilities are truly endless, and these devices will become smaller and easier to use as they get developed. As large technology companies make progress in their various fields, do-it-yourself enthusiasts can keep up by simulating new advances on their own, as well as create all-new technologies with the help of the multiple sensors and various expansion capabilities of these devices. If I haven't included your favorite Arduino or Raspberry Pi gadgets, feel free to add them in the comments below!
Sources: MakeUseOf, GestureR, Parallax, Wyolum, Spark-Core, Kickstarter (PiScreen), MicroView, Radio Shack


14 Comments - Add comment