Snap Assist is a convenient window managing feature that lets you quickly arrange apps on your display. Hover the cursor over the maximize/minimize button, and the operating system will present you with a few prebuilt window layouts. Clicking a zone will snap the current app to the select area. In the recently released Windows 11 build 25300, Microsoft is experimenting with several Snap Assist improvements.
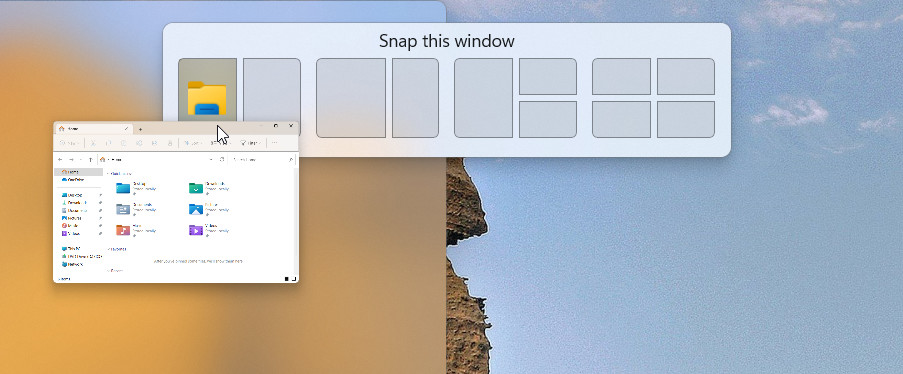
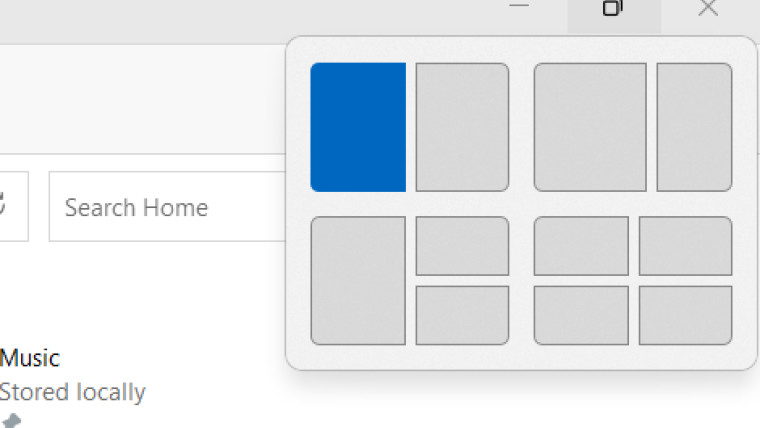
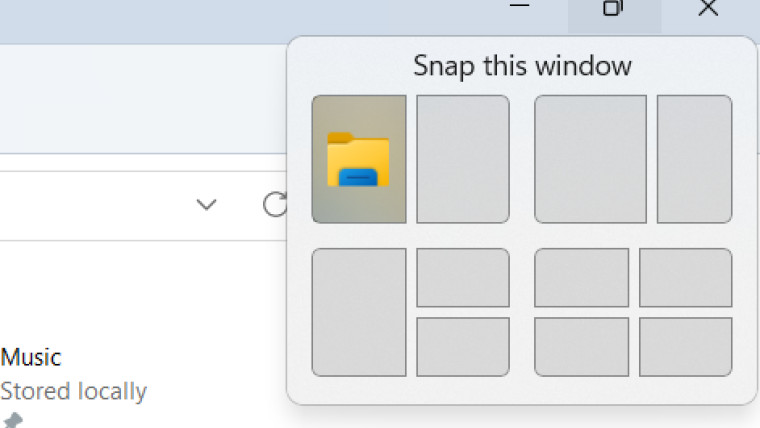
According to the official release notes, Microsoft wants to improve the feature's discoverability by reducing the hover time required to invoke Snap Assist. In addition, there is descriptive text explaining what the feature does and the current app's icon. Here is how the old Snap Assist compares to the new one:
Microsoft wants Windows Insiders to test several variants of the updated Snap Assist. One option only reduces the timeout, and the other adds the description and app icon in the picked layout position. You can try both variants using the Vivetool app and share your thoughts with Microsoft via the Feedback Hub (via @PhantomOfEarth on Twitter).
Caution: Back up important data before experimenting with the ViveTool app. Remember that using stable Windows 11 is the best way to ensure your system remains as bug-free as possible.
How to enable the updated Snap Assist in Windows 11 build 25300?
- Download ViveTool from GitHub and unpack the files in a convenient and easy-to-find folder.
- Press Win + X and select Terminal (Admin).
- Switch Windows Terminal to the Command Prompt profile with the Ctrl + Shift + 2 shortcut or by clicking the arrow-down button at the top of the window.

- Navigate to the folder containing the ViveTool files with the CD command. For example, if you have placed ViveTool in C:\Vive, type CD C:\Vive.
- Type vivetool /enable /id:40851068 /variant:1 and press Enter. This command will keep the old Snap Assist variant and decrease the hover time.
- Type vivetool /enable /id:40851068 /variant:2 and press Enter. This command will add the "Snap this window" description and your current app icon.
- Type vivetool /enable /id:40851068 /variant:3 and press Enter. This command will add the "Snap this window" description and your current app icon, plus reduce the hover time.
- Restart your computer.
If you change your mind and want to restore the original Snap Assist, repeat the steps above and replace /enable with /disable in the commands on steps 5, 6, or 7, depending on which variant you have been testing.
This is not the first time Microsoft shipped improvements for Snap Assist. Last year, the company released the Windows 11 2022 Update (22H2) with significant enhancements for window snapping. You can learn more about the updated Snap Assist in Windows 11 22H2 in our comprehensive review.


2 Comments
Load the comments and join the conversation!
Read the comments, ask the editors questions, show respect and join the conversation.