I've been fascinated by 3D printing for a long time. In fact,back in 2010, I wrote an article on Neowin about 3D printing a concert flute, and a few months later, covered the printing of food. When attending SXSW in 2015, I was intrigued by a session about bioprinting human tissue.
Last year, I purchased a Creality Ender 3 with the intention of learning more about the topic of 3D printing... and failed miserably. After numerous attempts, I was unable to level the print bed and a few weeks later, I gave up in frustration. So when Monoprice asked me if I'd be interested in reviewing the Voxel Pro, I was hesitant and told them that I wasn't sure I was the right person to write the review given my lack of previous success. After convincing me that this model was "easy for beginners," I decided to try it out - and was successful from the start.
Specifications
The Monoprice Voxel Pro is a fully enclosed printer, which is helpful for not only controlling the temperature, but also for keeping pets away from the hot moving pieces. The device itself is very heavy and very large, especially compared to the aforementioned Creality Ender 3, so once you find a place to put it, you might not want to move it. The printer is controlled via a touchscreen, and has a USB port for files and both WiFi and Ethernet for network connectivity.
| Size | 500 x 470 x 540mm (19.7 x 18.5 x 21.3 in) |
| Weight | 27.2 kg (60 lbs) |
| Build Area | 200 x 200 x 250mm (7.9 x 7.9 x 9.8 in) |
| Materials | ABS, PLA, PETG, PC, PLA-CF, ASA, PETG-CF |
| Extruder Type | Bowden |
| Nozzel | 0.4 mm (quick change) |
| Build Platform | PEI Spring Steel, heated |
| Bed Leveling | 9-point Assisted |
| Connectivity | USB, WiFi, Ethernet |
| Interface | 4.3 inch touchscreen |
| Layer Resolution | 0.1 - 0.4 mm |
| Maximum Power | 320 watts |
| Camera | Yes - photo and video |

There's nothing on the back of the printer, but the side has a single Ethernet port, power plug, and an on/off switch. The side is also has a compartment where you load the spool of plastic for printing.
The printing bed is made of spring steel and is held down magnetically. This makes it a snap to pull out of the printer and flex to get your print off.
The Voxel Pro has a HEPA filter on the case, but that's to prevent dust from entering the enclosure, not to protect you from the prints; in use, I wasn't able to smell anything from the printing process though.

The Voxel Pro also includes several tools you'll require over time: a Phillips head screwdriver, some Allen wrenches, a couple of filament guide tube joints, a 0.4‑265 nozzle (the pre-installed nozzle is 0.4-240), a nozzle cleaner, an oval leveling card, some grease, and a USB flash drive.
From what I can tell, the Monoprice Voxel Pro is simply a rebranded Flashforge Adventurer 4. This is helpful for finding replacement parts, since I could only find nozzles on Monoprice's storefront. The Voxel Pro is also $100 cheaper than the Adventurer 4, coming in at $699.
Setup
The initial setup the Monoprice Voxel Pro is very easy, and you'll find that the hardest part is actually taking it out of the box.
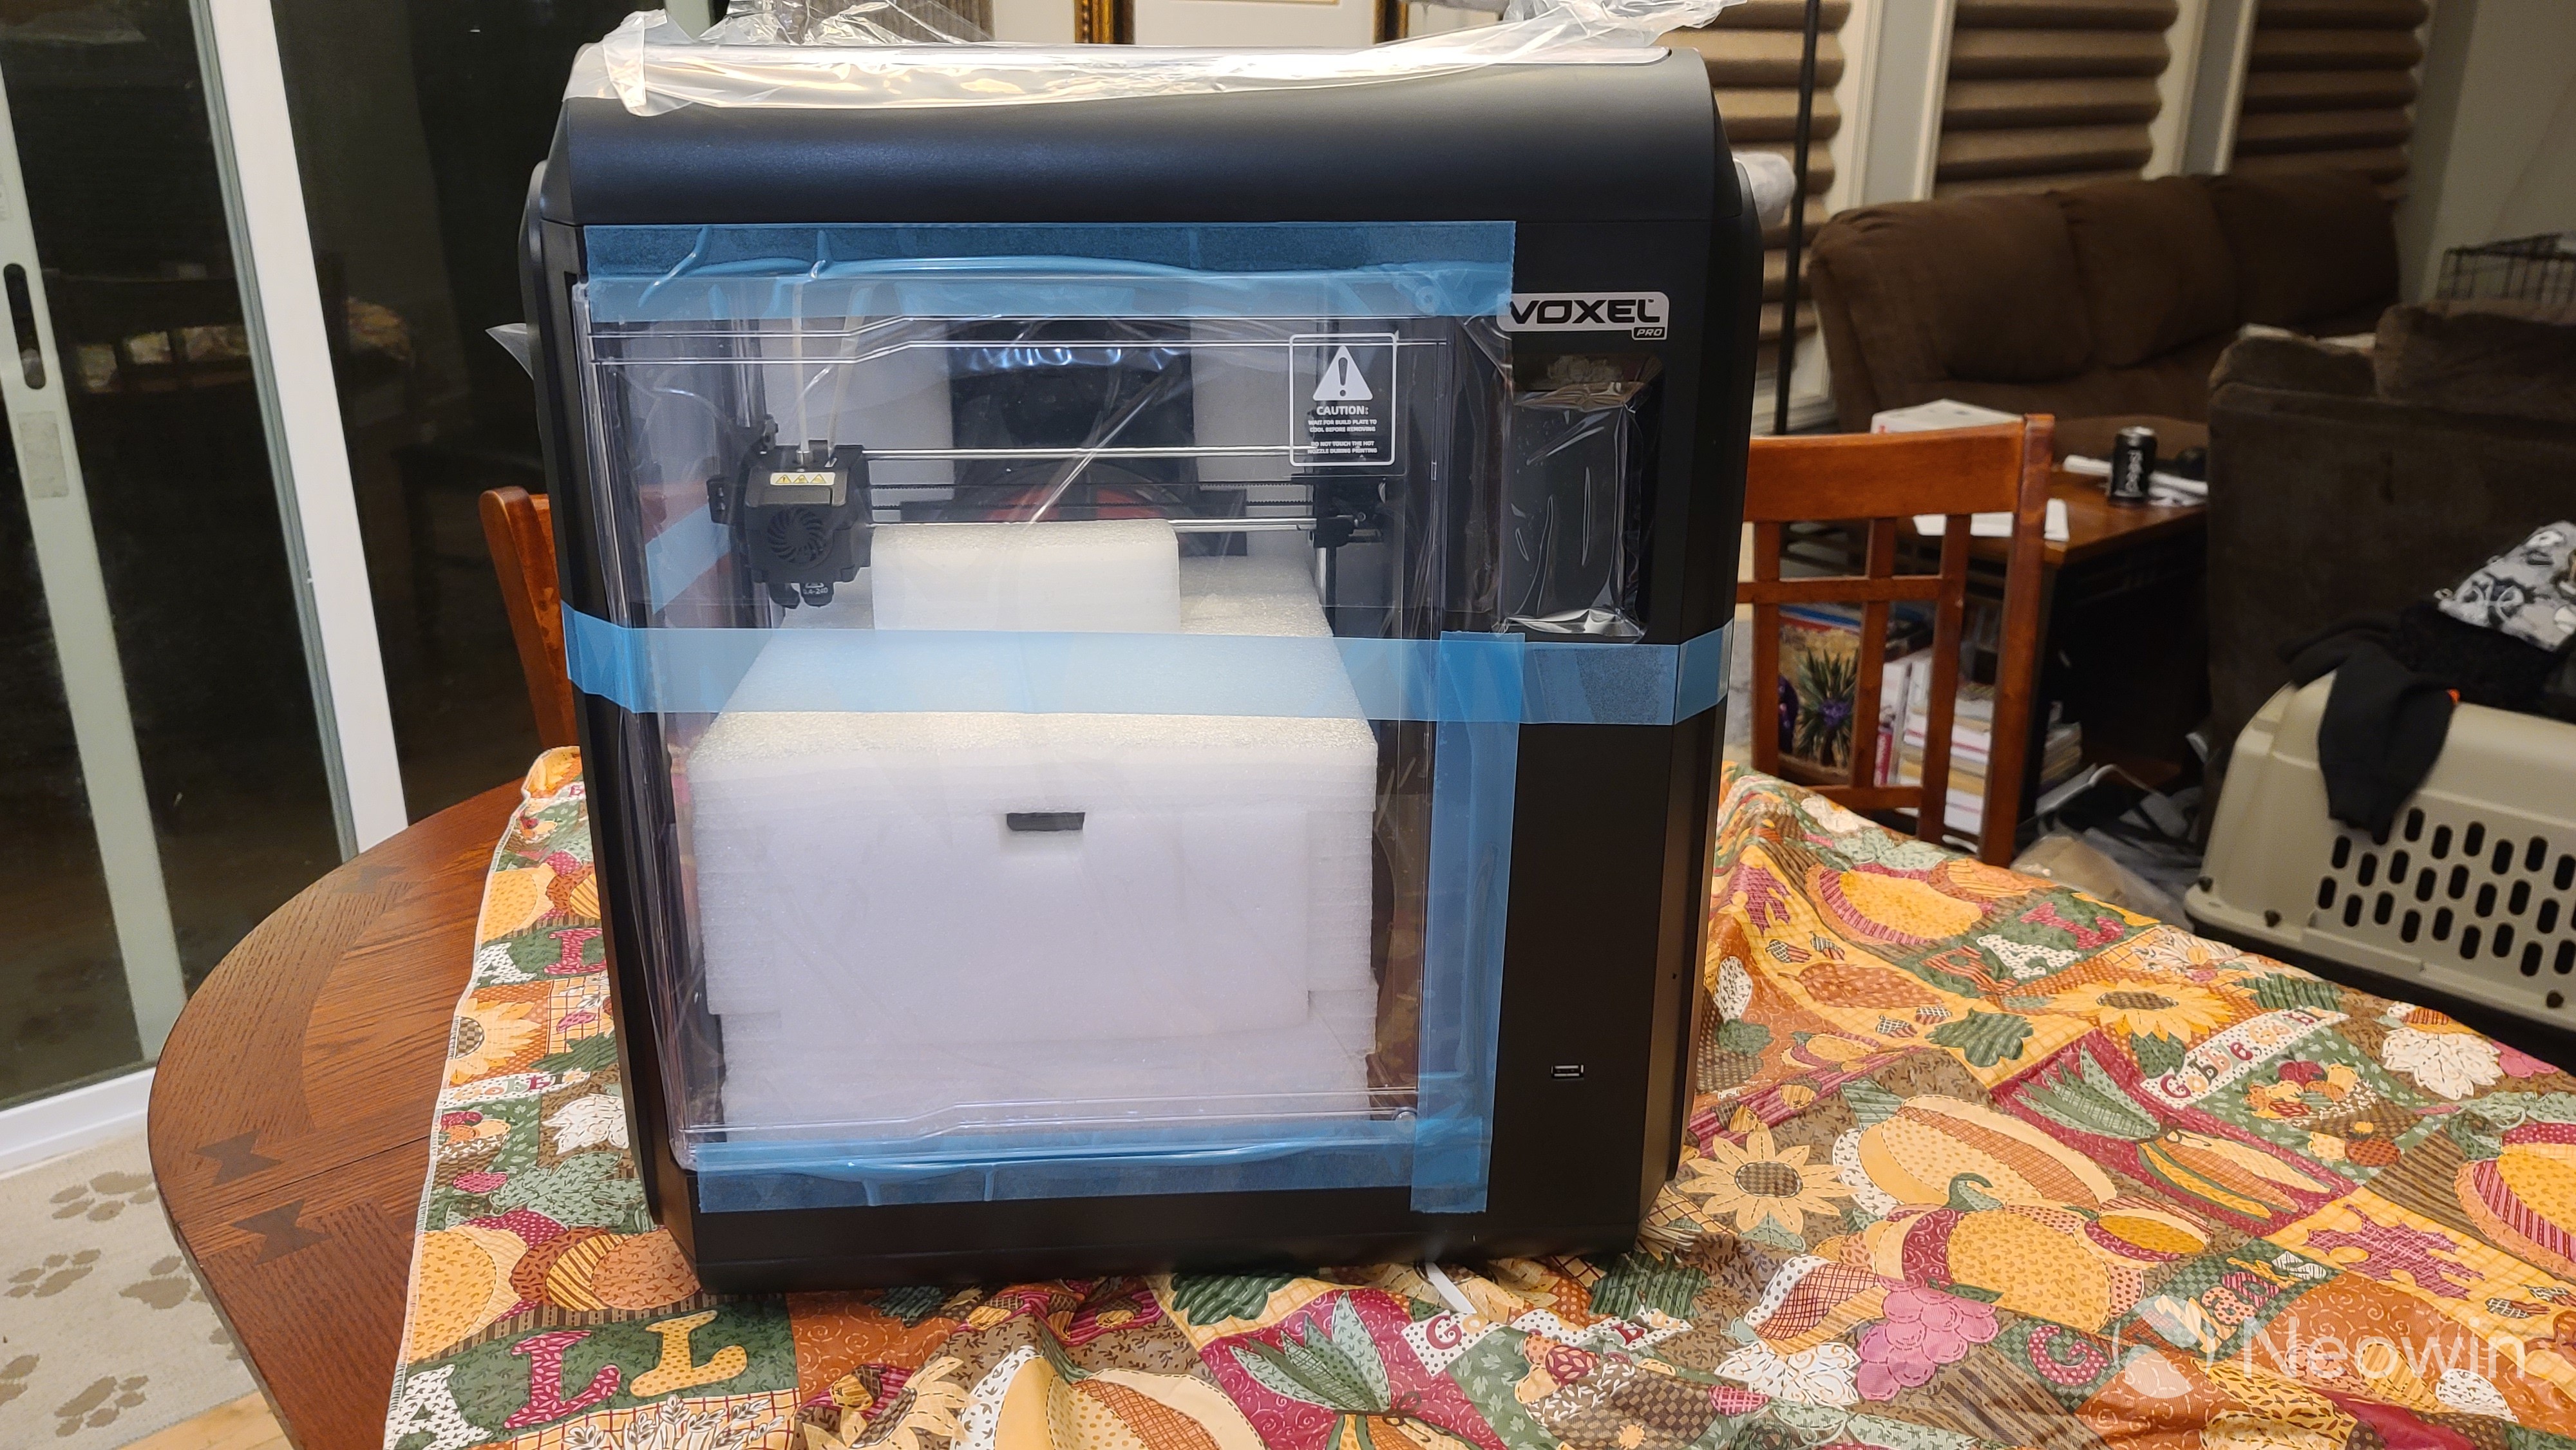
The device comes fully assembled, so you just have to remove all of the packing material from around and inside of the 3D printer. Since the device is so large and heavy, it's recommended to have someone help you move it to its desired location.

The first thing the setup has you do is configure the WiFi. Since the device also has a physical Ethernet port, this step is optional. The little display makes typing long passwords difficult, but not impossible, and you really only need to configure the network if you want to be able to view prints remotely or send a model directly to the printer instead of through USB.
After the packing material is out and the printer is plugged in, you go through the steps of feeding the (included) filament into the printer. Click the prepare button, followed by the load button, and you're done. The instructions say to press a button once plastic is coming out of the extruder, but I found that the Voxel Pro automatically stopped feeding the filament on its own once it was ready.
The final step is to level the printing bed. This is the most critical step, and is where I ran into issues with my Crealty Ender 3. The general idea is to put the print nozzle close enough to the print bed that you can slide a piece of paper between it and the bed to have a bit of resistance, but nothing more. With the Ender 3, if I had one side leveled perfectly, it became unleveled when I tried to fix the other side, so was a frustrating experience. The Voxel Pro, on the other hand, was a breeze. You start the leveling process and the printer moves the nozle to nine different locations on the bed and asks you to raise/lower the print head at each spot until it's perfectly setup. That's it. While the marketing says it's "auto-leveling," which isn't true because it requires manual intervention, it was still a very easy process.
At this point, I attempted my first print: A small 3D square. This model was pre-loaded and pre-sliced on the printer, so I just selected it from the print menu and watched the Voxel Pro do its thing. It started by printing a raft and then printed the square on top of the raft. When the print was done, it was trivial to pull the magnetic bed off, twist it a bit, and have the square come off. Getting the raft off is a bit more work because it sticks to the bed extremely well, but overall it isn't too bad.
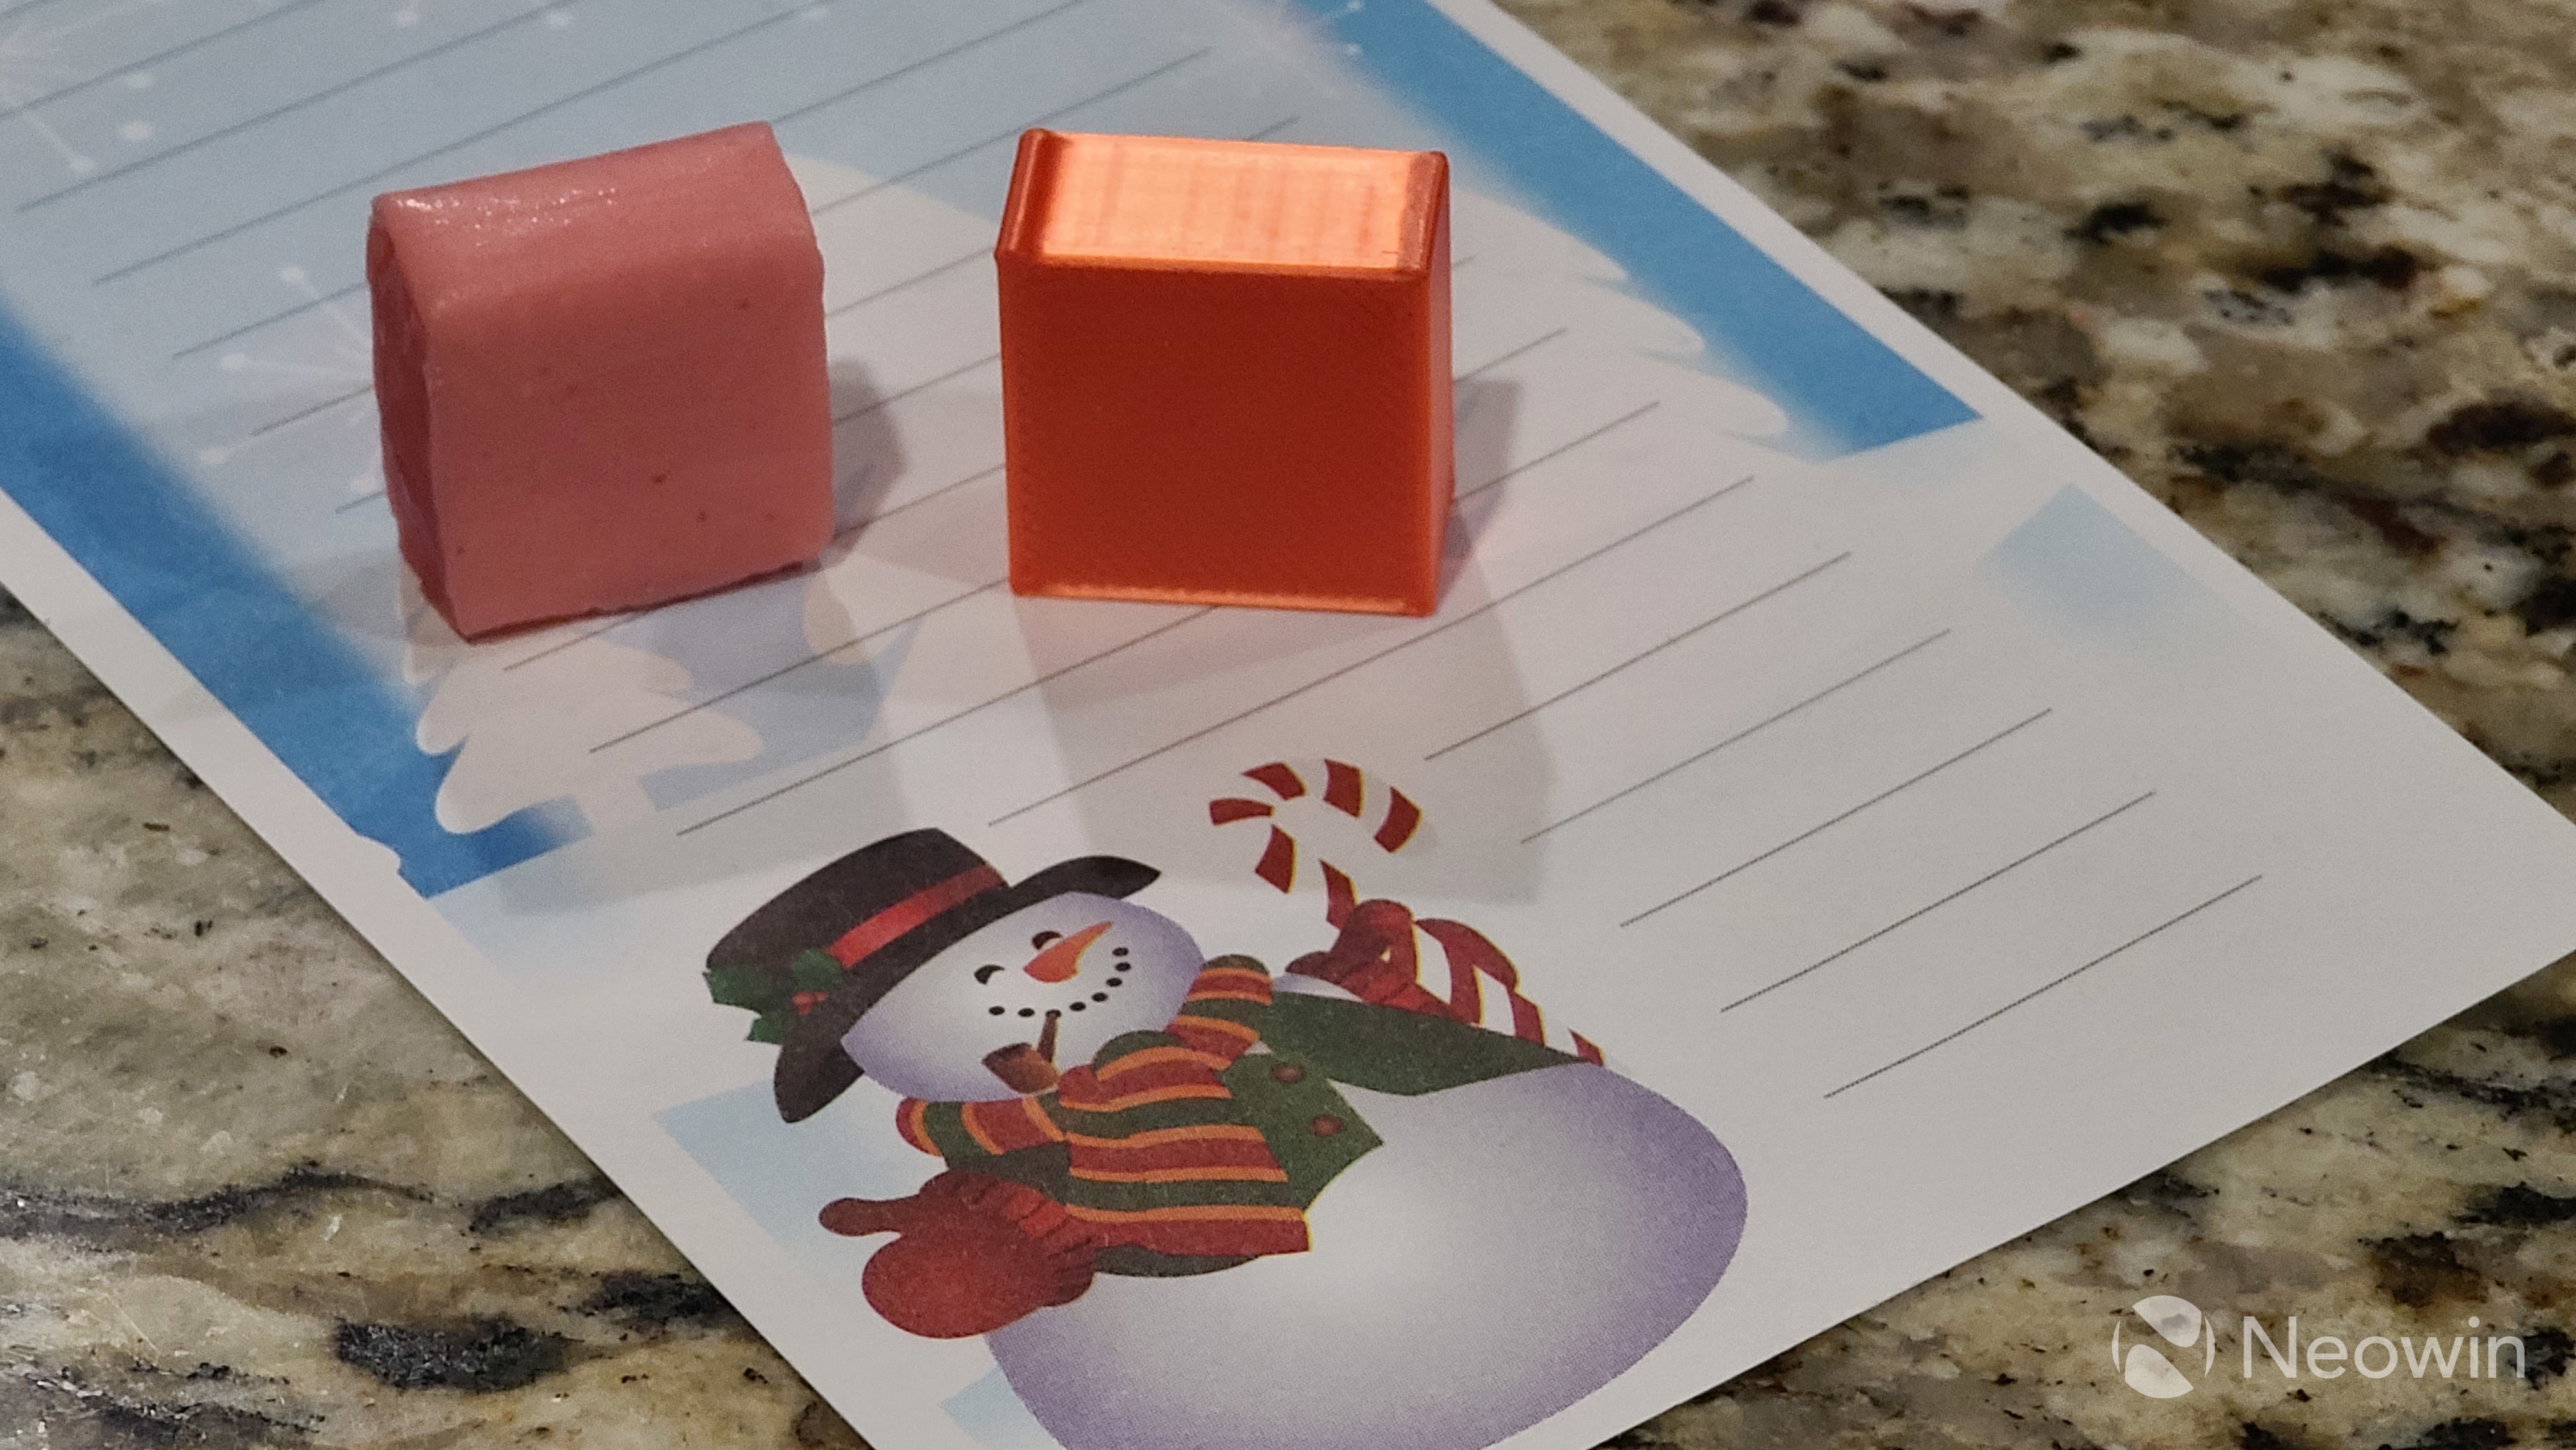
My first print turned out great and, as you can see, it looks a lot like an orange Starburst candy.
Preparing Files and the Slicer
If you want to print more than just colorful squares, you'll need to load up a proper slicer. The USB drive included a copy of FlashPrint-MP, or you can download it from the web. I chose the latter, but found out later that the version on the drive was the same, so either would've been fine.
Installation of the software is straight forward. Once it's installed, you can load up an STL file, click the Slice button, wait a bit, and then either save the resulting file to a USB drive or, if the printer is connected to the network, click a button to automatically upload the data and have it start printing.
Unfortunately, there doesn't seem to be any software available for mobile devices.
I don't have a lot to compare the FlashPrint-MP software with, but overall it feels a bit lacking. The basic features seem to work pretty well. You can load multiple models into the tool, move and rotate them around, scale them to fit better, and even cut them into multiple pieces, which is kind of nice. However it's not very beginner friendly and will require some research as well as trial and error to fully understand.

For example, I tried printing an object that clearly requires supports, but FlashPrint-MP didn't make any by default, which ended up making a big mess. Poking around, I finally figured out that I could click a button to automatically add supports, but it did a terrible job, so I had to manually start adding them myself. Again, for an experienced person, this isn't a big deal, but for a printer aimed at beginners, I would've liked some extra help.
Printing
Once you begin printing, the waiting game begins. If you're new to 3D printing, you'll probably find yourself coming back to watch the progress a few hundred times as it's fascinating to watch. My daughter had a friend visit while I was testing a print, and she said, "I could watch this all day."
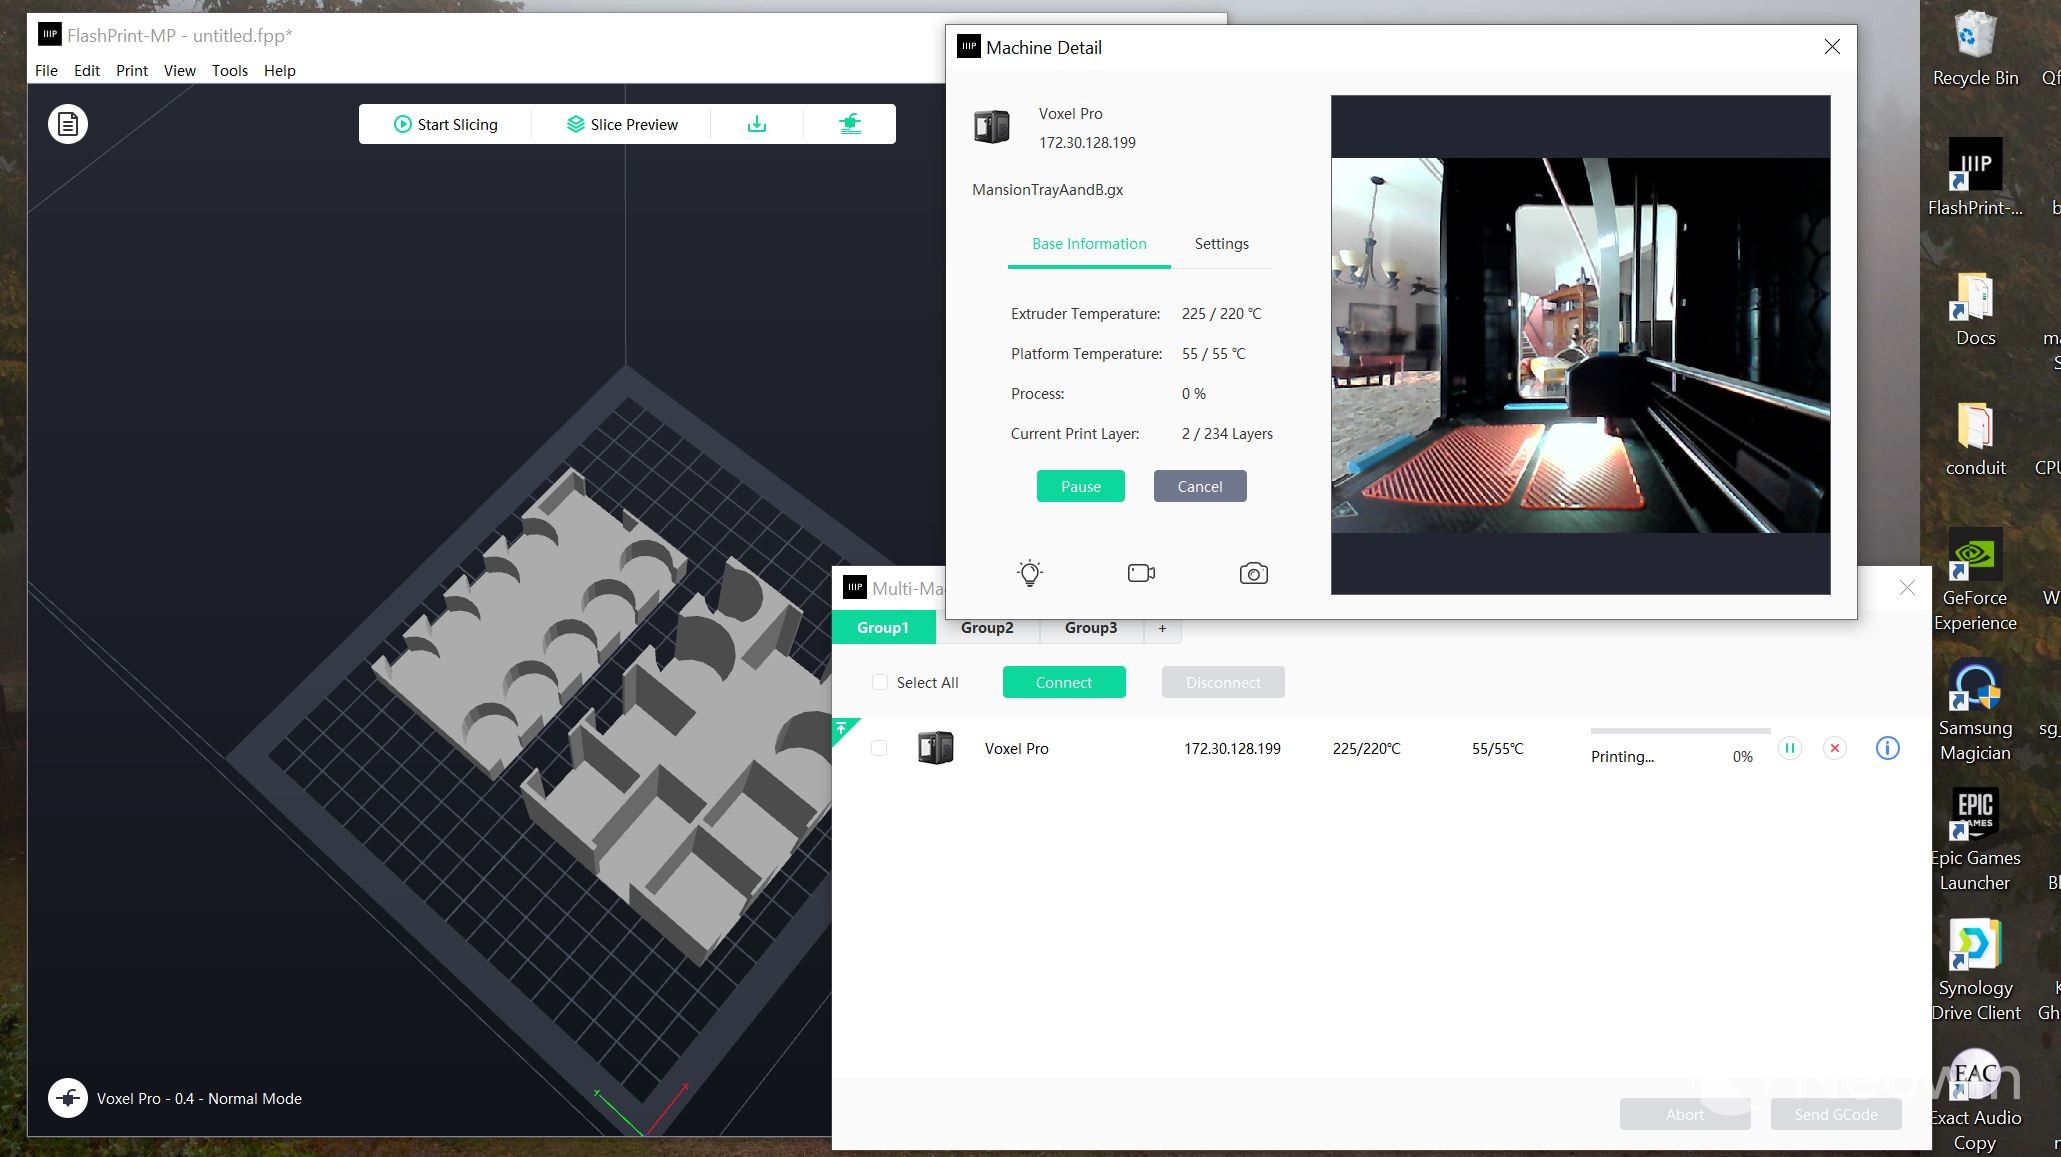
If you want to keep an eye on it all day, you actually can, because the Monoprice Voxel Pro has a built-in camera that is accessible via FlashPrint-MP. From the tool, you can turn the LED light on and off, and watch the progress of the print. The camera quality is a bit lacking, but at least you have the ability to make sure the print isn't failing. Unfortunately, this is where I'd love to be able to use an app on my phone to keep track of the status, but I wasn't able to find a way to do that.
You can also configure the printer to save a stop-motion video of the print. However the lack of camera quality, combined with the lack of ability to tune the video, means the results are practically worthless and not worth viewing. Having said that, you can see for yourself in the video above that shows a 3D snake being printed. The print itself took 2.5 hours, and the time-lapse video condensed it down to a mere ten seconds, which isn't really long enough to be of use.
It's also a little disappointing that the printer doesn't give you an estimate as to how much time is left in the print job. The display shows how much time has elapsed, how many layers have been printed, and what percentage is complete, but like a Windows install screen, it can jump for 92% to 100% in a couple of minutes, as happened with the snake print. It'd be nice if, at the very least, the printer kept track of how long a print took so that printing it a second time gave accurate information, but it's a minor quibble.
You don't have to use the network to start your print job. As noted earlier, you can move the G-code to the printer by USB drive as well. Simply plug the drive in, click the "Print" button, select the model, and go. It really couldn't be any easier.

The material on the bed is very sticky, which is great for keeping your print from failing, but can make it difficult to get the raft off. I often had to use a bench scraper to get the raft off, and it left some scratches on the bed. There was no noticeable performance difference, but I suspect that over time, it will require new print bed.
Conclusion
There's a certain magic in being able to make something physical from a printer in your own house. Being able to go online, download a file, and in a few (or in some cases, many) hours, have a physical object in your hands is amazing. The Monoprice Voxel Pro makes that magic as easy as setting up a regular printer and clicking a button.

The Monoprice Voxel Pro is not a cheap printer, and I'm sure there are cheaper options (like the aforementioned Crealty Ender 3). However if you're looking for something that you can just take out of a box, click a few buttons, and have your prints just work, I think you'll be hard pressed to find something better than Voxel Pro. Without much work at all, I was able to download and print things from a standard Benchy tugboat to a fully articulated snake, so for that reason, I highly recommend the Monoprice Voxel Pro. As of writing it is not available on their Amazon page, but they do have a few other cheaper options you can check out.
Our stories may contain links for products where Neowin is paid an affiliate fee if you complete a purchase via those links.


_small.jpg)


35 Comments
Load the comments and join the conversation!
Read the comments, ask the editors questions, show respect and join the conversation.