Nothing has been released for the Android Beta Program just yet, and you'll have to wait until May for that. For the next couple months, your only option is to flash it.
Note that there is a reason that it hasn't been released to the Beta Program; this is an alpha build, and it's not recommended that you install it on a device that you use day-to-day. But if you're like us, you need to get your hands on the latest to find out if it's the greatest.
Here's how to install the Android O Developer Preview:
First things first. If your device is enrolled in the Android Beta Program, you need to unenroll it. If you flash Android O while you're enrolled, you'll get an OTA that will take you right back to the Android 7.1.2 Nougat beta.
You'll need to download some stuff to your PC. You'll need the Android O Developer Preview image that corresponds to your device, which you can find here, and Android Studio, which you can find here. Once Android Studio downloads, run the installer and select all of the defaults. Note: You should be able to do this using the command-line tools as well, which are available from the same page. This guide assumes that you've installed Android Studio.
Now that you've got Android Studio installed, there's one more thing that you need to do to get your PC ready. You need to launch the SDK Manager which, assuming that you installed with default settings, will be found in C:\Program Files (x86)\Android\android-sdk. Right-click on 'SDK Manager' and click 'Run as administrator'. Note: If you don't run it as an administrator, you won't be able to complete the next step.
Once you open it, you should see about 15 boxes checked, but what you really need are 'Android SDK Platform-tools', which should be near the top, and Google USB Driver, which should be near the bottom. Install or update these using the button on the bottom-right, and agree to the licenses.
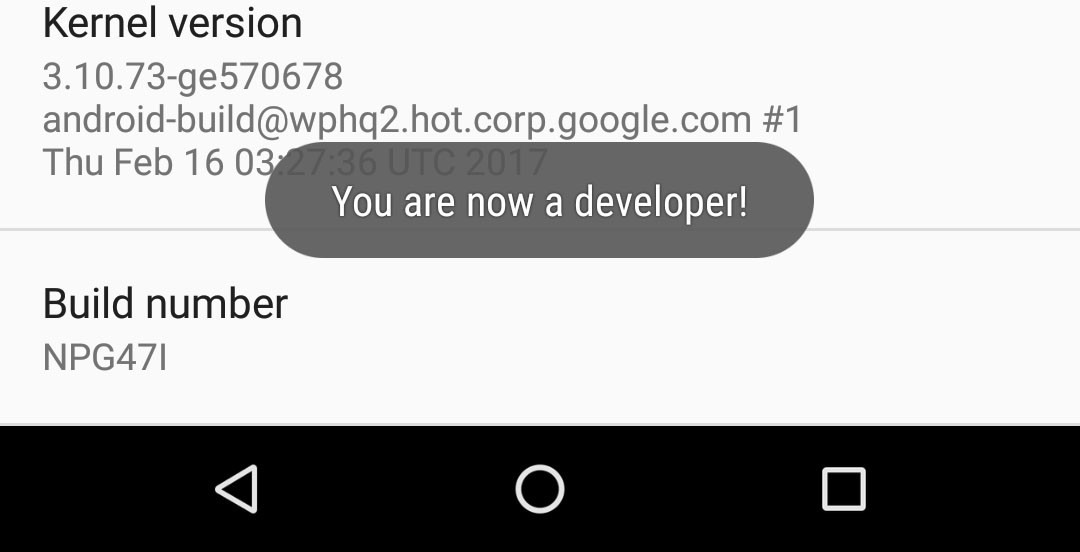
Now that your PC is ready to go, it's time to prep your phone. Go to Settings -> About phone and locate the Build number. Tap the Build number seven times; this will unlock Developer options in Settings.
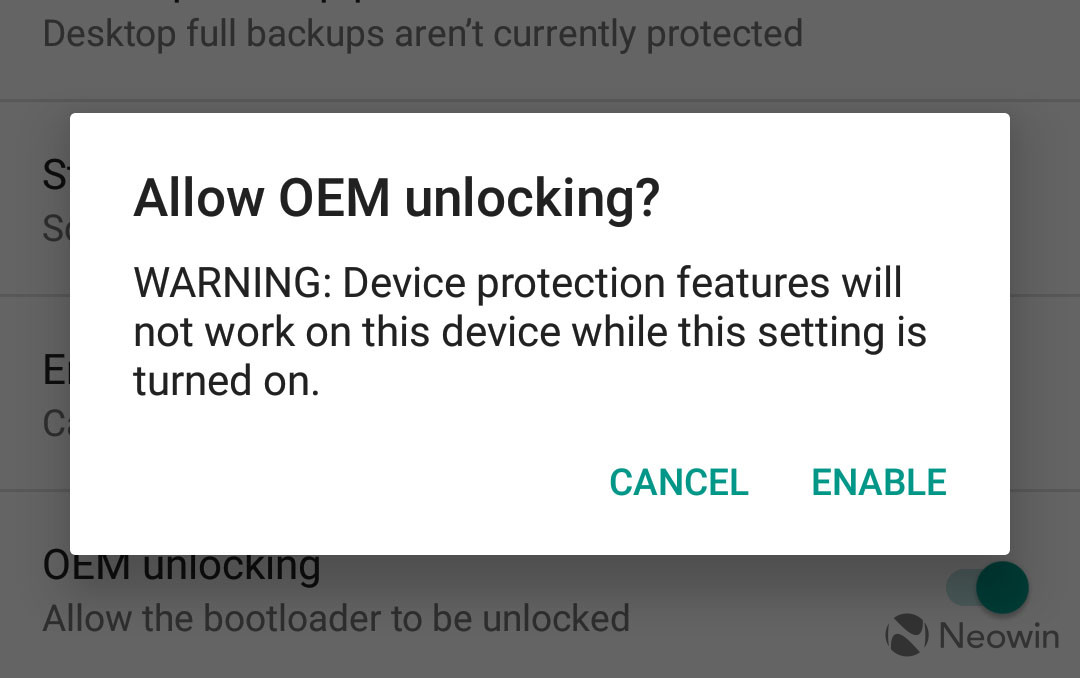
Go back to the main page and select 'Developer options', which should now be right above 'About phone'. First, turn on 'OEM unlocking'. Without allowing this, you won't be able to unlock the bootloader.
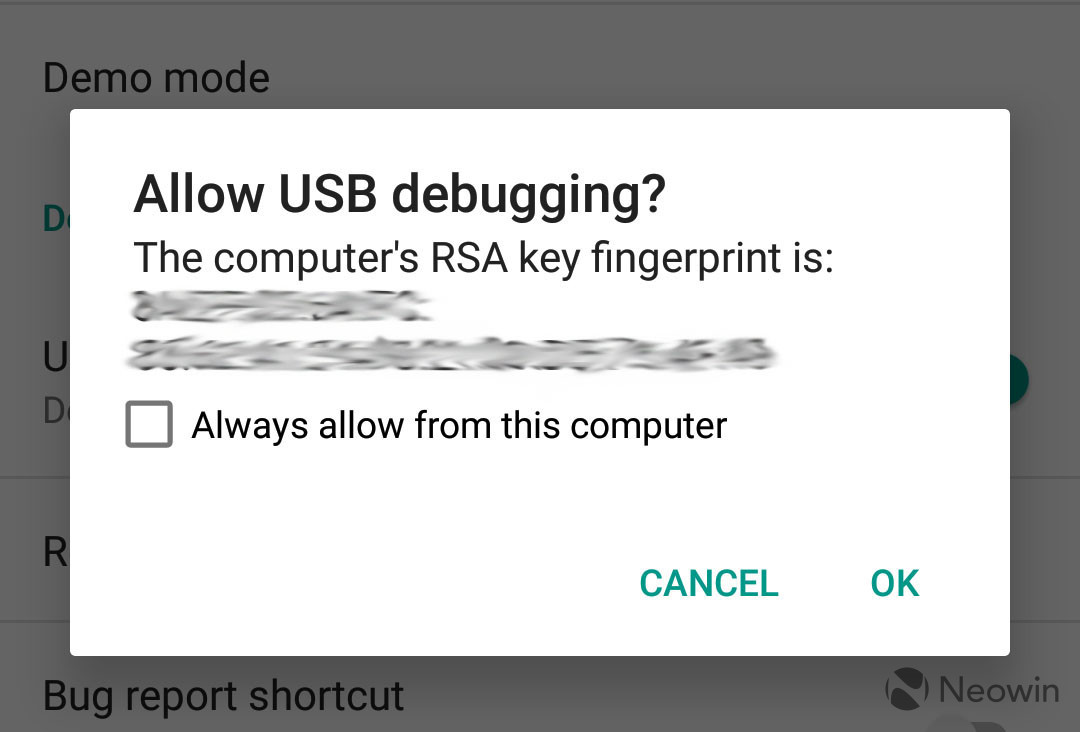
Next, scroll down until you see 'USB debugging' and turn that on too. If your device is already connected to your PC, you'll likely see a dialog pop up asking if you want to trust it. If not, you'll see it later.
Your phone and PC are prepped, so if you haven't done it already, connect your phone to your PC via USB.
Go back to the same folder that you found SDK Manager in, and locate the 'platform-tools' folder. While holding shift, right-click on it and select 'Open a command window here'.
While you're in platform-tools, extract the ZIP file that you downloaded with the Android O image, and copy all of the contents of the folder to platform-tools.
Enter the command 'adb devices'. You should see one device attached, but if you don't, you did something wrong. The USB driver might need to be installed manually, or you might just need to accept that confirmation for your device to trust your PC. Once you see your device listed, move on to the next step.
Enter the command 'adb reboot bootloader'. This will reboot the phone into fastboot mode.
Enter the command 'fastboot oem unlock', which will unlock the bootloader. You might have to confirm this from the device.
Next is the final step. Simply enter the command 'flash-all', and the package will take care of itself.
If you run into an error at this point, you'll need to extract the one ZIP file you have left in platform-tools, and enter the following commands to do it manually: fastboot erase bootloader
fastboot erase system
fastboot erase vendor
fastboot erase cache
fastboot erase recovery
fastboot erase boot
fastboot erase userdata
fastboot flash bootloader
fastboot flash system system.img
fastboot flash vendor vendor.img
fastboot flash cache cache.img
fastboot flash recovery receovery.img
fastboot flash boot boot.img
That's it. As soon as you're done flashing, the device will boot into the out-of-box experience for Android O. Have fun exploring the next version of Android!


5 Comments - Add comment