
Microsoft released a new Windows 11 Insider build for Dev channel users. The new build, 23516, brings new bug fixes and improvements. Alongside the ones announced, Microsoft often introduces new features that are not a part of the changelog. These unannounced features are hidden gems meant for enthusiasts to figure out. Sometimes, some of these features are not enabled as they are meant for future releases.
One such feature appears to be a new Windows repair option that the tech giant has been testing. The option is hidden in the new Dev build 23516 but it is already enabled on the Canary channel. This means Microsoft is looking to introduce this feature to more Insiders.
Within the Windows Recovery section in the Settings app, the new feature allows users to perform an in-place upgrade to fix and repair issues with their current Windows install. This troubleshooting mechanism is likely going to be quite useful as most of the issues on Windows are often resolved by reinstallation.
The option is labeled "Fix problems using Windows Update" and when one opts to use it, a "repair version" of the build is downloaded for reinstallation.
 |
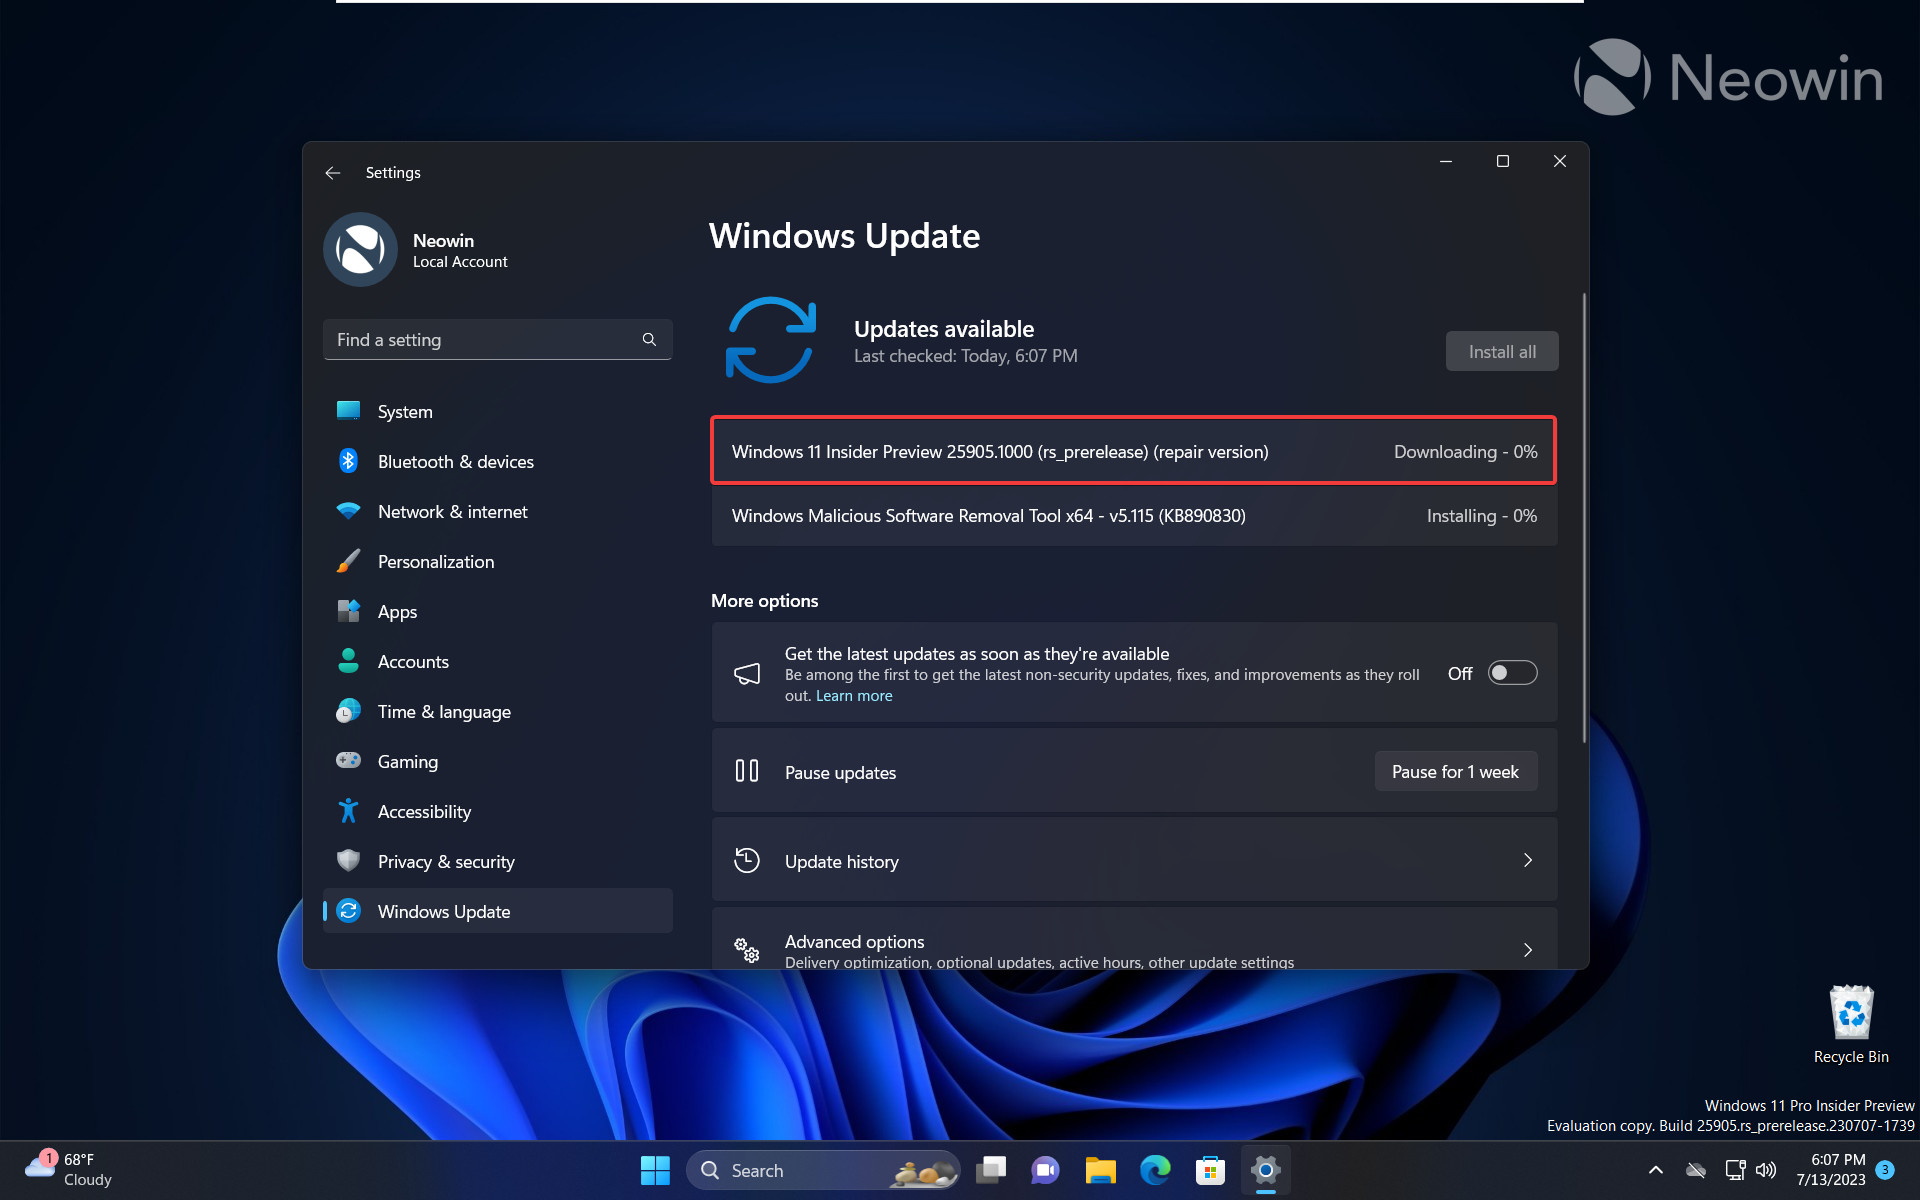 |
As mentioned above, the feature is hidden in the new Dev build 23516 but it can be enabled using ViVeTool. Do keep in mind though that the feature is not yet enabled likely because it may not be fully stable yet.
Caution: Unannounced features are often raw, unstable, or borderline unusable. Back up important data before enabling them with the ViveTool app. Remember that using stable Windows 11 is the best way to ensure your system remains as bug-free as possible.
- Download ViveTool from GitHub and unpack the files in a convenient and easy-to-find folder.
- Press Win + X and select Terminal (Admin).
- Switch Windows Terminal to the Command Prompt profile with the Ctrl + Shift + 2 shortcut or by clicking the arrow-down button at the top of the window.

- Navigate to the folder containing the ViveTool files with the CD command. For example, if you have placed ViveTool in C:\Vive, type CD C:\Vive.
- Type vivetool /enable /id:39847173 and press Enter.
- Restart your computer.
If you change your mind, repeat the steps above and replace /enable with /disable in the commands on steps 5 and 6.


2 Comments
Load the comments and join the conversation!
Read the comments, ask the editors questions, show respect and join the conversation.