Do you love customizing your Windows desktop? If you do, you'll love this trick!
By default, Windows 7 includes several locations to choose pictures and desktop backgrounds from, such as Windows Desktop Backgrounds, Pictures Library, Top Rated Photos, and Solid Colors. In this article, I will walk you through the process of creating your own wallpaper collection through the registry, and how to customize it to your liking. This process will help you categorize and sort your wallpapers efficiently, and allow you to use a mix of categorized wallpapers with Windows 7's new automatic background shuffle without the need to lump everything together.
Disclaimer: The steps in this article involve modifying the Windows registry. Serious problems might occur if you modify the registry incorrectly. Therefore, make sure that you follow these steps carefully. For added protection, back up the registry before you modify it. Then, you can restore the registry if a problem occurs. For more information about how to back up and restore the registry, review Microsoft Knowledge Base article 332756 (How to back up and restore the registry in Windows).
Step 1: Organize your wallpapers
The first step is pretty easy. You will need to create a folder hierarchy (figure 1) to place your different wallpapers in (such as %USERPROFILE%\Pictures\Abstract, %USERPROFILE%\Pictures\Nature, etc. - see figure 1), or tag your wallpaper images (figure 2) with categories (like Family Photos, Animals, etc).
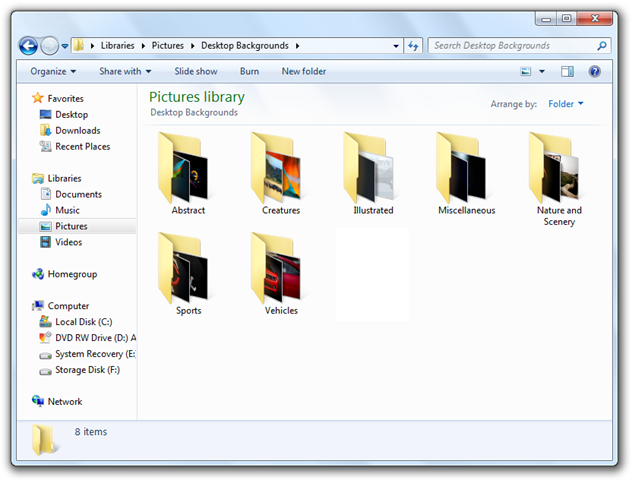
(Figure 1 - A folder hierarchy containing various types of background images.)

(Figure 2 - Setting tag categories on images)
Step 2: Creating the registry entries for your wallpaper collection
- Click on Start, type "regedit.exe" in the Start Search field, and then press Enter.
- Provide consent or the appropriate credentials to User Account Control if prompted.
- Navigate to HKEY_CURRENT_USER\Software\Microsoft\Windows\CurrentVersion\Explorer\Wallpapers\KnownFolders.
- Right click on the KnownFolders key, click on New, and then click on Key. Name the new sub-key 1.
- In the 1 sub-key, create a new String Value (REG_SZ) and change its name to GROUPBY.
- Double click on the GROUPBY string value (REG_SZ) and set its value according to the following guidelines:
- If your wallpapers are in a single folder and you are using tags to sort your wallpapers, set the value to System.Keywords.
- If you are sorting your wallpapers using a hierarchy of multiple sub-folders, set the value to System.ItemFolderNameDisplay.
- In the 1 sub-key, create a new String Value (REG_SZ) and change its name to NAME.
- Double click on the NAME string value (REG_SZ) and change it to whatever you wish, for example "Personal Wallpaper Collection" - this is the name that will be displayed in Windows Explorer.
- Right click on the 1 sub-key, click on New, and then click on Key. Rename the sub-key to whatever you wish, such as Personal Wallpaper Collection.
- Right click on the sub-key that you just created (e.g. Personal Wallpaper Collection), click on New, and then click on Key. Name the new sub-key MergeFolders.
- Create a new String Value (REG_SZ), and change its name to equal the path of your wallpapers directory. For example, C:\\Users\\Kristan Kenney\\Pictures\\Desktop Backgrounds\\Abstract.
- Repeat step 11 for each additional folder of wallpapers that you wish to add to the collection.
- Close the Registry Editor.
- Log off and then log in in order for Windows Explorer to see the new wallpaper collection registry entries.
IMPORTANT: If you are using a folder hierarchy, you must include all of the sub-folders in the MergeFolders sub-key, as shown in figure 3:

(Figure 3 - the Windows Registry Editor, showing a list of sub-folders)
Step 3: Enjoy!
Right click on the Desktop, and then click on Personalize. When the Personalization window appears, click on Desktop Background, and then click on the drop-down next to "Picture Location". Click on your wallpaper collection that you just created, and then choose as many wallpapers as you want (figure 4).
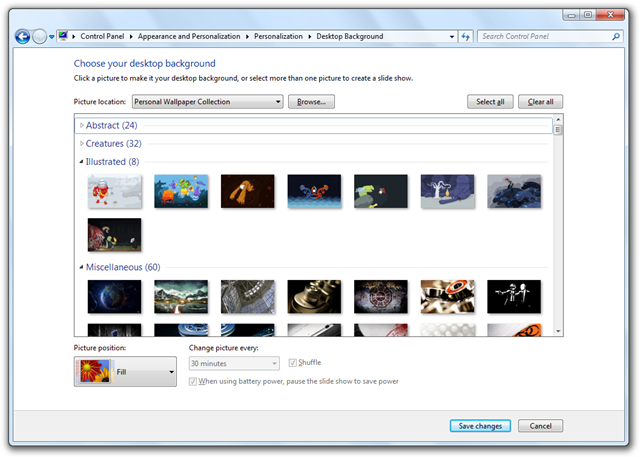
(Figure 4 - A sample wallpaper collection)
But wait, that's not all!
In step 6, we went through the process of assigning a view method to the GROUPBY string value, such as System.Keywords (sort by Tags) or System.ItemFolderNameDisplay (sort by Folder name). There are other view methods available as part of the Windows Shell (Windows Explorer), such as System.RatingText (which will allow you to sort your images by rating). You can find many more to try in the online MSDN Library.
Please note, a lot of the System namespace shell properties are context specific, so there are a few that won't work, or will produce weird results. For example, using System.IsIncomplete or System.FlagStatusText will not do anything useful with your wallpapers.


27 Comments - Add comment