While Microsoft already ships a decent set of fonts with Windows 10 which Office apps also utilize, there may come a time in your life when they may not be enough and you may feel the need to install a custom font downloaded from the internet. Such a moment came recently in my professional life when a client wanted my team to develop a dashboard in Microsoft Power BI using a custom font. Although we thought there would be a straightforward solution for this requirement, we learned that we would need to specify the font in a JSON theme file, but it would only work if said font is installed on your Windows machine.
Much to our disappointment, we learned that the font the customer wants us to utilize is not available in Windows 10, which means that we have to install it first. Thankfully, the process to install new fonts on Windows 10 is easier than I anticipated, and today, I will walk you through what you need to do in order to enable the same, should you ever be faced by a similar requirement - or if you just want to try new fonts. This approach will also work for apps installed on Windows 10, like Microsoft Office.
Step 1: Download a custom font

First up, you obviously need to have the custom font downloaded on your machine. There are multiple ways to do this. Starting with the built-in options on Windows 10, you need to head over to Settings > Personalization > Fonts and click on "Get more fonts in Microsoft Store", as can be seen in the screenshot above.
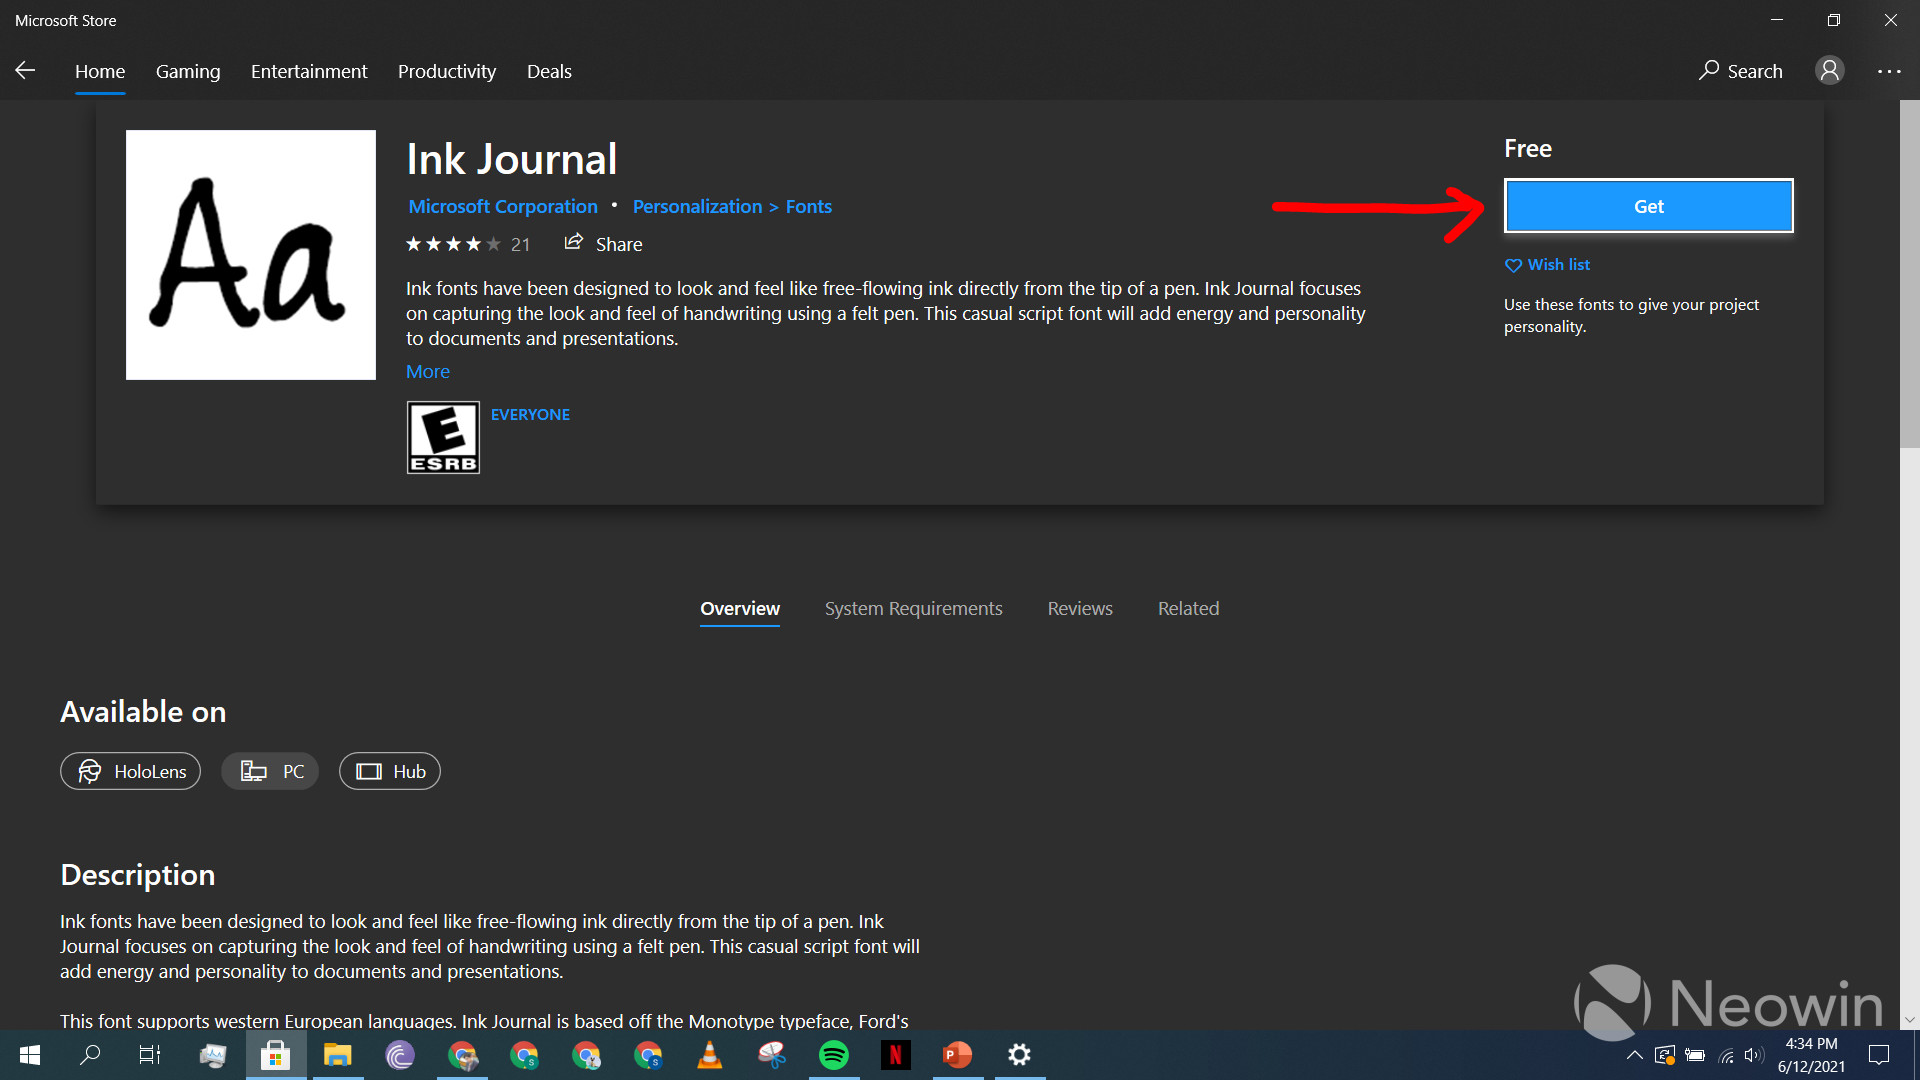
This will open a dedicated section in the Microsoft Store listing some custom fonts. Choose any font that tickles your fancy, and click on the "Get" button from the store listing. For the sake of this guide, I clicked on the "Ink Journal" font, as can be seen above.

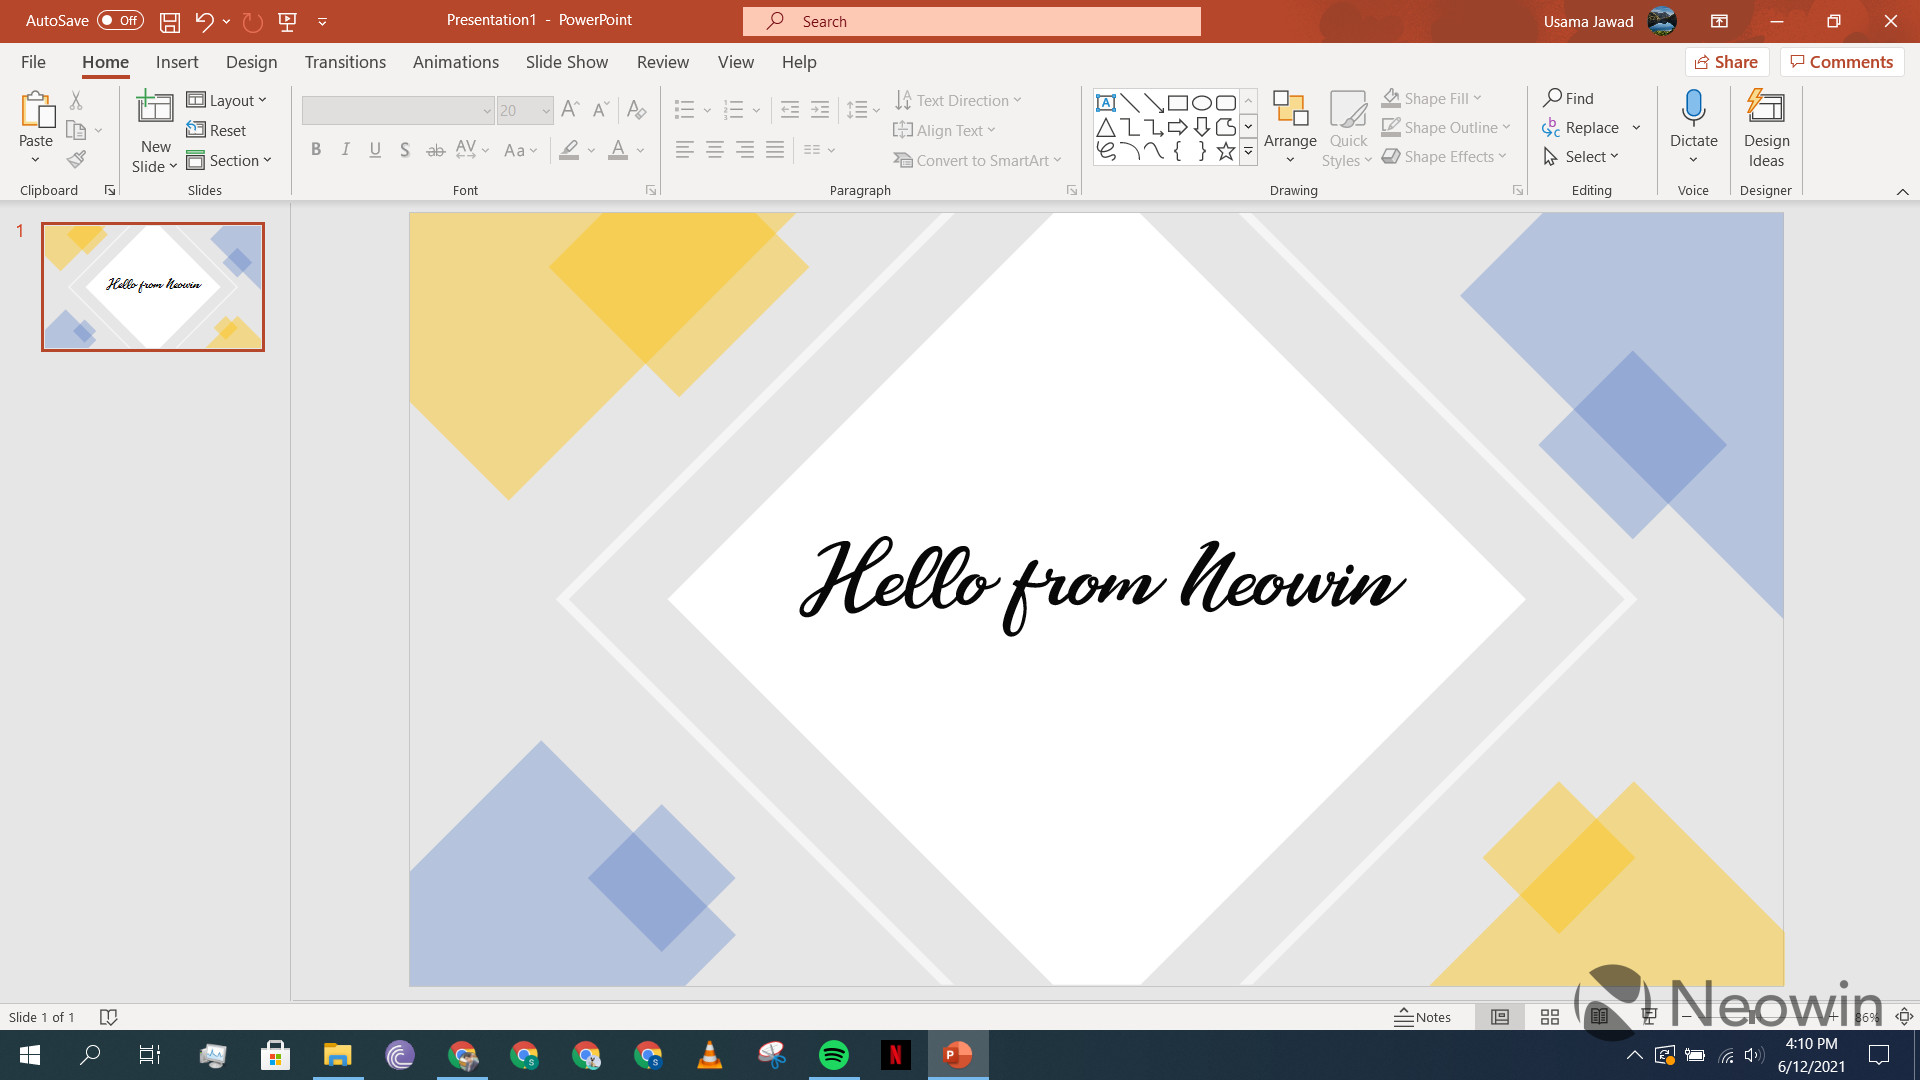
Once the font is installed, it will be visible to you in Office apps from the fonts drop down. As you can see in the screenshot above, I selected the "Ink Journal" font which I just installed, and I can use it without any issue.
But wait, what if a font you want is not available in the Microsoft Store? That is a completely valid scenario considering the Microsoft Store just contains a couple dozen custom fonts, and it's very likely that if you're looking for a specific obscure font, it won't be there. Or maybe you just like the fonts available there.
In this case, we would want to download something from the web. Good news is that this is fairly simple too. Supported font file format types in Windows 10 are .ttf and .otf, which stand for TrueType and OpenType respectively. If you're interested in knowing the difference between them, there are multiple guides available on the web which tell you exactly that, however, this is out of the scope of this article.

In our case, we are only interested in downloading .ttf or .otf font files and install them on Windows 10. Luckily, there are lots of dedicated websites which offer exactly that, such as Font Squirrel and DaFont, among others. Most downloads will contain a .zip file which you would need to extract using WinRar, 7Zip, or some other compression tool. In our case, I downloaded "Cassandra", just because it looks fancy, sue me. As you can see in the screenshot above, there is font file named "CassandraPersonalUseRegular-3BjG.ttf", which is what I'll be installing in the next step. This concludes our first step in terms of your options for downloading fonts not available on the Microsoft Store. For the sake of simplicity and brevity, I'll refer to whatever font you downloaded as the ".ttf file" in the next parts of this guide.
Step 2: Install a custom font
Now that you have downloaded a .ttf file from the web, your next step would be to install it on your machine. There are multiple ways to do this but you may require administrative privileges on your operating system because fonts on Windows 10 are installed in the C:\Windows\Fonts directory by default.

One way to install the custom font would be to once again open the Settings > Personalization > Fonts configuration in Windows 10, and at the top, you'll notice an option called "Drag and drop to install". Do exactly that with the .ttf file you downloaded, and that's it. After you do this, it will also be visible in the fonts list on the same page. A screenshot of this option is attached above.

Another way to install a font is via the context menu. Simply right click on your .ttf file which will open the context menu containing two options called "Install" and "Install for all users". The first will install it just for the current user, the second will install it for all users and is something to consider if you are using a shared machine. Click on either of these options depending on your preference as shown in the screenshot shown above, and you're done.

Yet another option to accomplish the same as the two alternatives described above in this step is to simply double-click on the .ttf file which will automatically open it in a dedicated editor. Click on the "Install" option at the top, and that's pretty much it.

Once you're done with either of the options explained in the step above, the font will be visible in the list on the Settings > Personalization > Fonts page as well as the C:\Windows\Fonts directory. A screenshot of the former is above. You could copy-paste the font file to the C:\Windows\Fonts directory directly and while that may be the fastest option, it's not the most user-friendly if you're not familiar with the Windows directory structure.
Step 3 (optional): Uninstall a custom font
If you viewed this article just to find out how to install a custom font, you don't need to read further. That said, there may come a day where you would like to uninstall a custom font just to clear the bloat on your machine as well as the options available to you in Office apps on Windows 10.

In this case, simply head over to the same Settings > Personalization > Fonts page, locate the font you want to uninstall and click on it. This will open a dedicated page for the font, where you'll see a button called "Uninstall" as shown in the screenshot above. Click on it, and the font will be uninstalled. This concludes our guide as well!
Did you find this guide useful? Have you ever come across this use-case before? What other tutorials would you like to see on Neowin next? Sound off in the comments section below!


19 Comments
Load the comments and join the conversation!
Read the comments, ask the editors questions, show respect and join the conversation.