Hi, I'm Adam, I'm known as Warwagon on the forum. For the past 19 years, I've been operating my own computer repair business. In doing so, I deal with the average computer user on a day-to-day basis.
Every bit of information I provide for people I do so with the lowest common denominator in mind. It's a common misconception that everyone who joins or browses a tech site is a techie. Some people are just looking for guidance. That is why for some, these tech tips may seem a bit too simplistic but they are educational for others.
Built into modern web browsers is a feature called "Private Browsing / incognito mode". When in this mode the browser does not save your browser cache, history or any of the cookies for any of the websites you visit.
But, what if you could have private browsing but also save all your cookies and keep your browsing history? Maybe you want to keep a certain aspect of your browsing private from other people who can access the computer, but also enjoy the benefit of retaining bookmarks, history, and cookies for site preference settings?
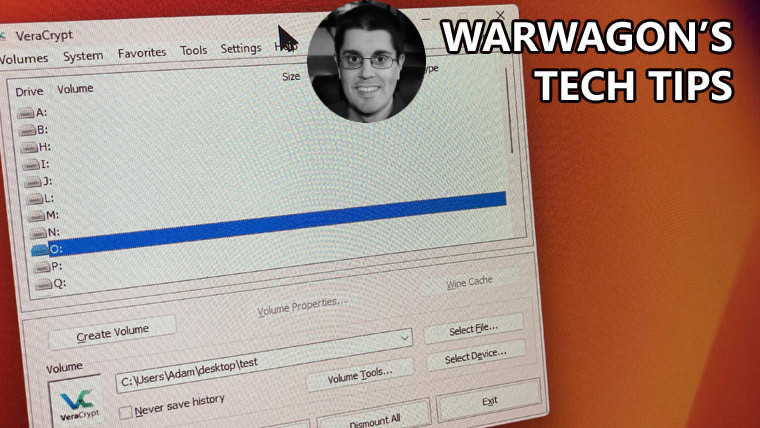
This can be done using 2 free tools in combination. Veracypt and Portable Firefox.
Note: It should be noted that private browsing / incognito mode also blocks trackers and extensions. Which is not disabled by default in Portable Firefox. Instructions for this are at the end of this guide.
Veracrypt allows you to create a portable encrypted container that you can store on your computer, a USB flash drive, or on an external hard drive. Portable Firefox is a version of Firefox which requires no installation and can be extracted and run from inside the encrypted container.
Everything you do on portable Firefox is contained ONLY in the encrypted container, cache, cookies history, extensions, etc.
Today I'm going to walk you through setting this up.
- First, we need to download and install Veracrypt
- Once installed, launch Veracrypt


- Click "Create Volume"
- Put a dot in "Create an encrypted file container" then click "next"

- Click "Standard VeraCrypt Volume" then click next
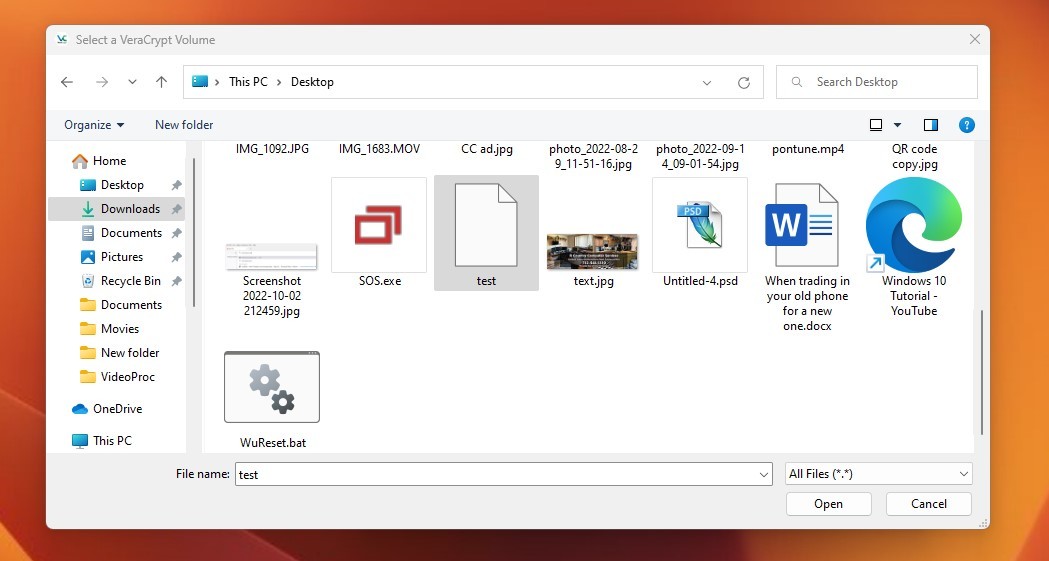
Now we have to select a location to put your encrypted container. Click "Select file" and decide where you wish to save it and then give it a name. The file will have no file extension. Once you give the file a name click "Save". Then click "next" and "next" again.

Now select how big you wish the container to be, I would say 4GB is a nice size.

- Click Next
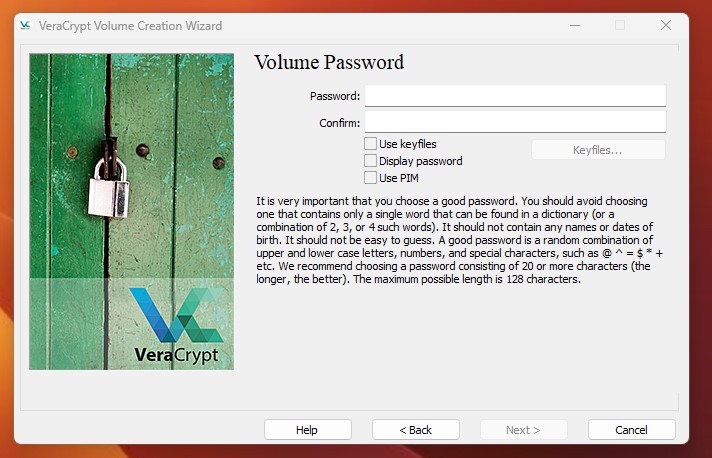
- Now give your encrypted container a password
- Click Next
Now wiggle your mouse around like a mad person giving your encryption some randomness. At this point, you can also choose your File system type. I'm going to choose NTFS.
- Click "Format" to format your encrypted container.

Congratulations you've just created an encrypted container.
Now let's mount it and put Portable Firefox inside of it.
- First Click "Select File"

- Locate the container you created and double-click it.
- Click "Mount"
- Type in your password
- Click "OK" (Give it a few seconds)
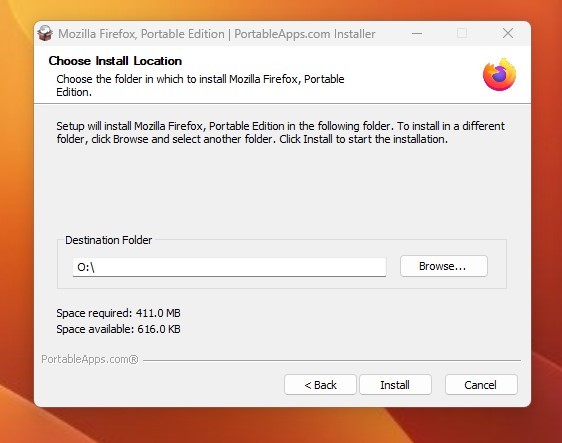
Your encrypted container will then be mounted to the drive letter above, in my case, it's drive letter O. So for the "Destination Folder" I would enter O:\
Now we need portable Firefox. It can be down from portableapps.com
Once downloaded, open it up. It will ask you where you wish to extract the contents. In my case I'm going to extract it to the root of my new encrypted container which is located on drive o:
- Click "Install"
That's it! Now open your containers drive letter and you should see Portable Firefox!
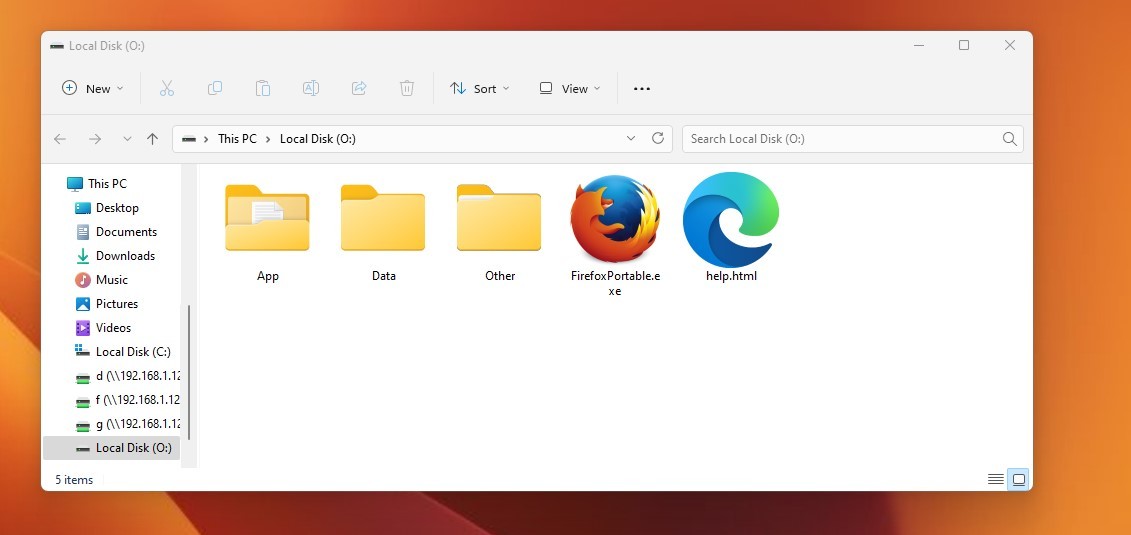
Now just open it and configure it to your liking, extensions and all!

How to disable cross-site Tracking Cookies, Tracking content, Cryptominers, and Fingerprints.
- Click the 3 horizontal lines in the top right of Firefox and select "Settings".
- Once in settings click "Privacy & Security" On the left.
- On the right Scroll down and select "Custom".
- Now choose what you wish to block.

The other great thing is it updates just like a normal version of Firefox, so you will always have the latest version!
Once you are done, close Firefox and go back to Veracrypt and click "Dismount"
Sometimes you have to click "force dismount"
Happy Computing!
If you learned something today, great! If not, maybe share your own tech tip in the comments below!


9 Comments - Add comment